


| Next Post - Previous Post List View
| |
 | 5/27/2014 5:03:33 PM How to Fill Big Gaps in Window Casing |
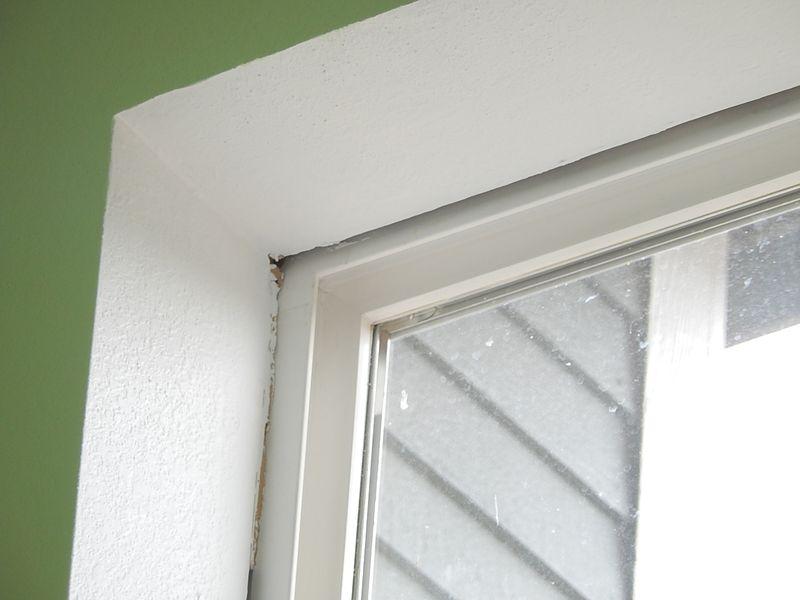
Because standing on the tip-top of a ladder with a half-gallon of paint, shaky arms, and a sore back is kinda like resting, right? Okay... not really like resting, but after the great bush adventure this weekend, I was ready to settle down and just work on some posts for the TinkerT Blog. But this particular post has been sitting in my drafts for a week waiting for that finishing touch. Which is... a coat of light green paint around the sides. Of the windows, not the post. 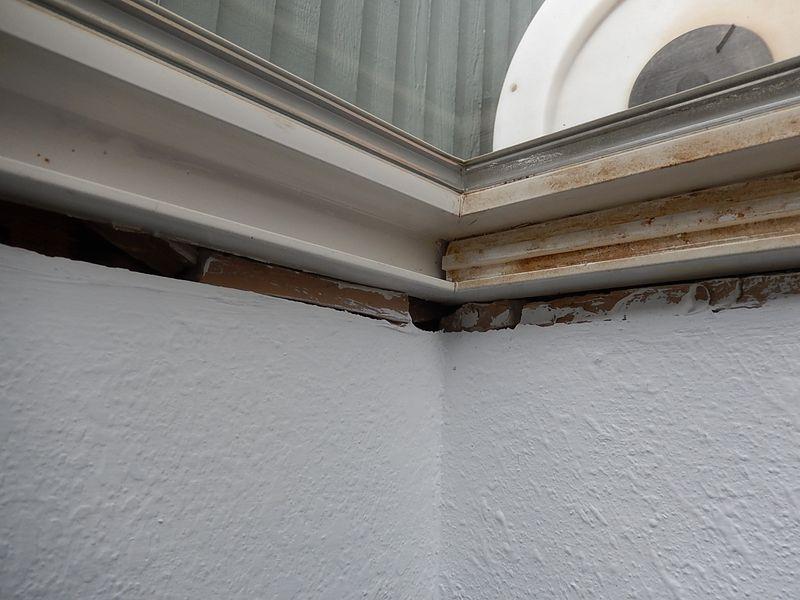 Always in a home you have those moments of "What were they THINKING?" and our upper window casings definitely fall into that category for me. Even I, who thinks that 99% of everything can either be fixed with duct tape or spackle, know that filling a inch wide gap between drywall and windows should NOT be done with a non-flexible plaster.Seriously... "What were they THINKING?" As soon as the windows flexed from heat and cold, that plaster started cracking and by the time we bought the house, about half of it was already falling out around most of our upper windows. So why was there this big gap they were filling in the first place? Well it is fairly easy to see that the old windows were replaced with newer double-pane vinyl windows. Which is really nice, but who ever did it should be taken out back with a willow switch for the horrible installation. Always in a home you have those moments of "What were they THINKING?" and our upper window casings definitely fall into that category for me. Even I, who thinks that 99% of everything can either be fixed with duct tape or spackle, know that filling a inch wide gap between drywall and windows should NOT be done with a non-flexible plaster.Seriously... "What were they THINKING?" As soon as the windows flexed from heat and cold, that plaster started cracking and by the time we bought the house, about half of it was already falling out around most of our upper windows. So why was there this big gap they were filling in the first place? Well it is fairly easy to see that the old windows were replaced with newer double-pane vinyl windows. Which is really nice, but who ever did it should be taken out back with a willow switch for the horrible installation.So now we have these 1/2 to 1 inch gaps all around our windows... much too large to just fill with caulk, but too small to justify adding full size casing boards around the whole window. 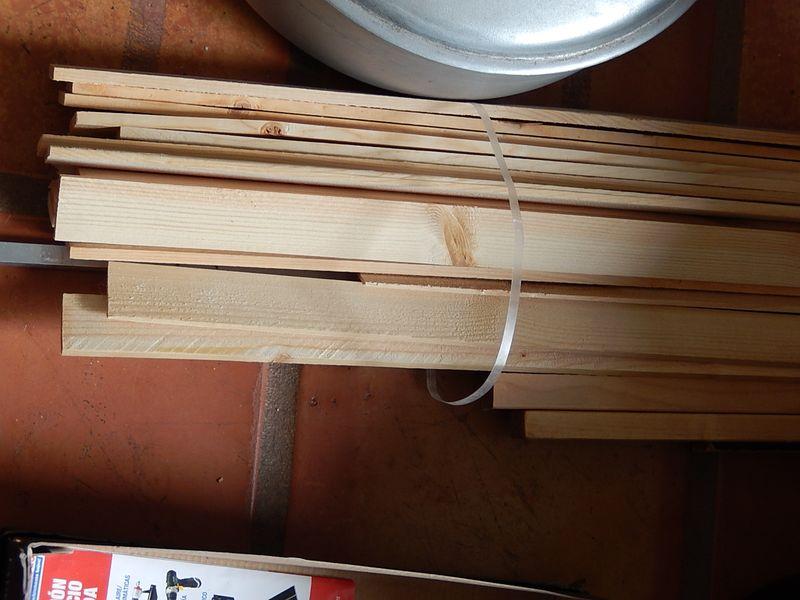 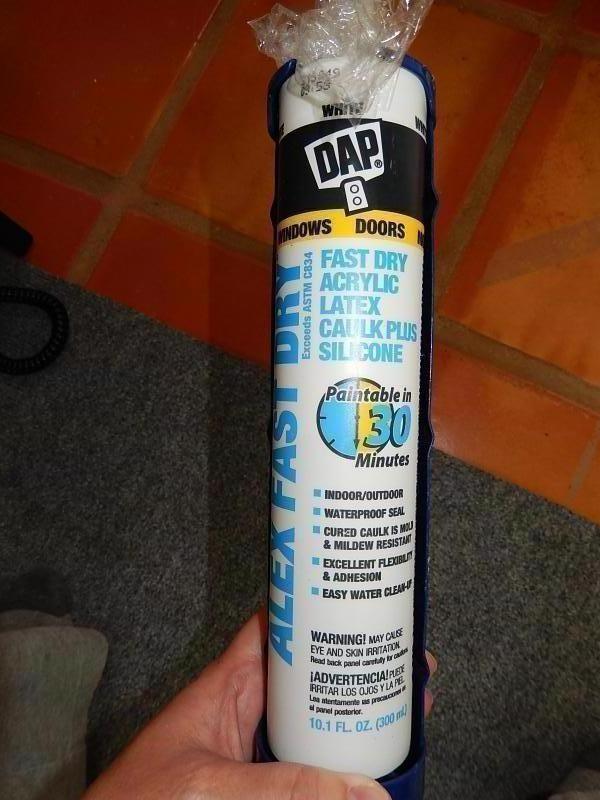 After a lot of deliberation and some helpful recommendations from my awesome brother-in-law-construction-guy, I decided that these left-over wooden slats I had gotten for another project might just be the thing to fix this mess. Along with some paint and some paintable latex caulking. After a lot of deliberation and some helpful recommendations from my awesome brother-in-law-construction-guy, I decided that these left-over wooden slats I had gotten for another project might just be the thing to fix this mess. Along with some paint and some paintable latex caulking.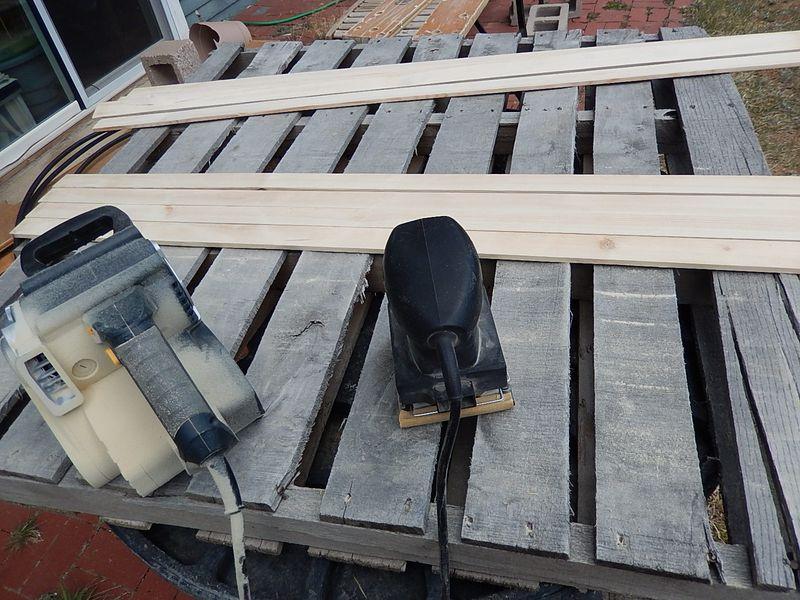 The first step was sanding the slats and giving them a coat of white paint. I knew they would need a second coat of paint to cover nails when installed, but the first coat gave me a jump start and made things easier. The first step was sanding the slats and giving them a coat of white paint. I knew they would need a second coat of paint to cover nails when installed, but the first coat gave me a jump start and made things easier.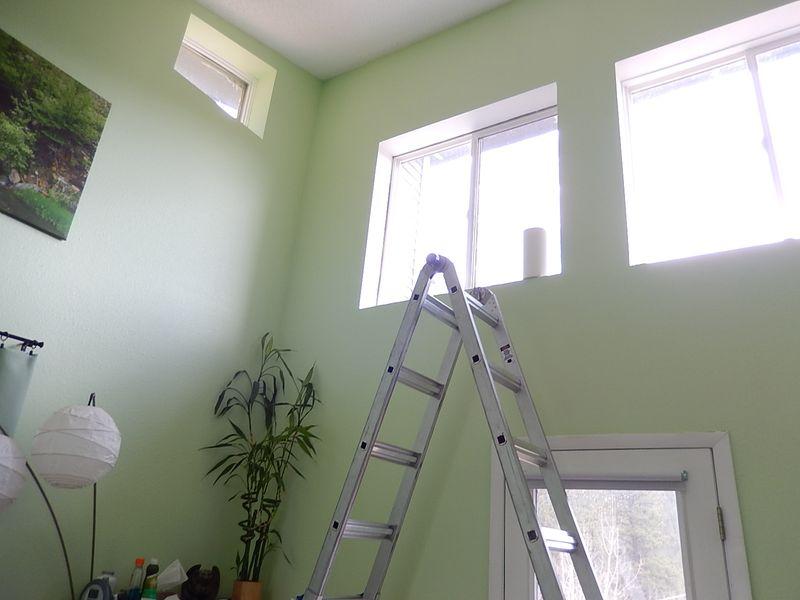 Then I measured each direction of the window because it is just folly to think that anything in a house will be truly rectangular, square, or for that matter at all straight. And while I was up there, a quick scrape of the corners and any bulges got the edge ready to be covered. 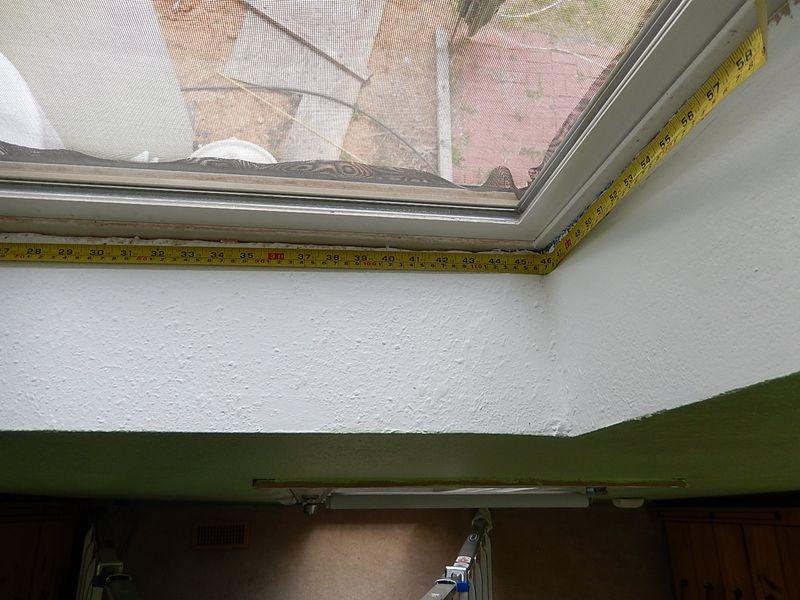  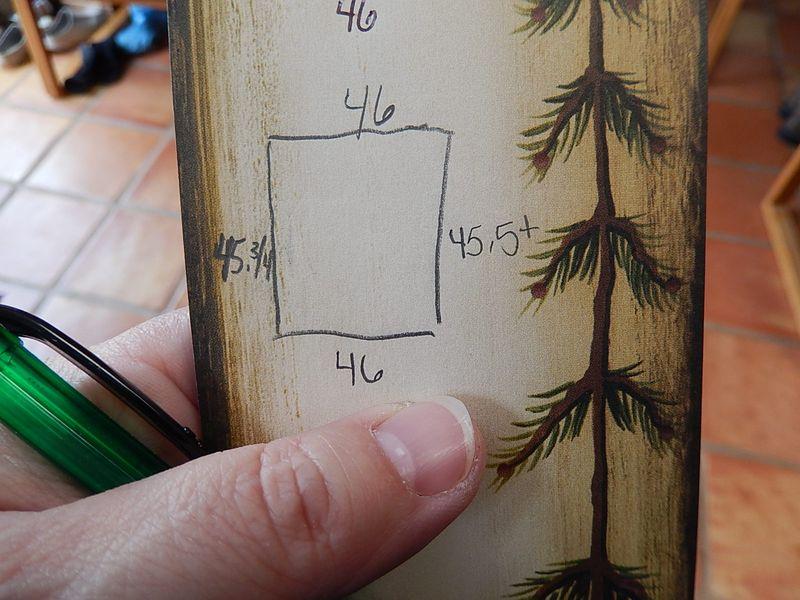 Something absolutely important to remember (so of course I forgot on the second window), is to subtract the width of the top plus the bottom, in this case a total of 5/8 inch, from the measurements for the sides, or the sides won't fit as you try to press them into place with caulk already on them. Something absolutely important to remember (so of course I forgot on the second window), is to subtract the width of the top plus the bottom, in this case a total of 5/8 inch, from the measurements for the sides, or the sides won't fit as you try to press them into place with caulk already on them.Mark each one, and write the corresponding letter, like B for bottom, on it so that you can match them to to correct side while balancing on a ladder, a brad-nailer in one hand, the slat in the other hand, and skewer-sticks in your mouth. 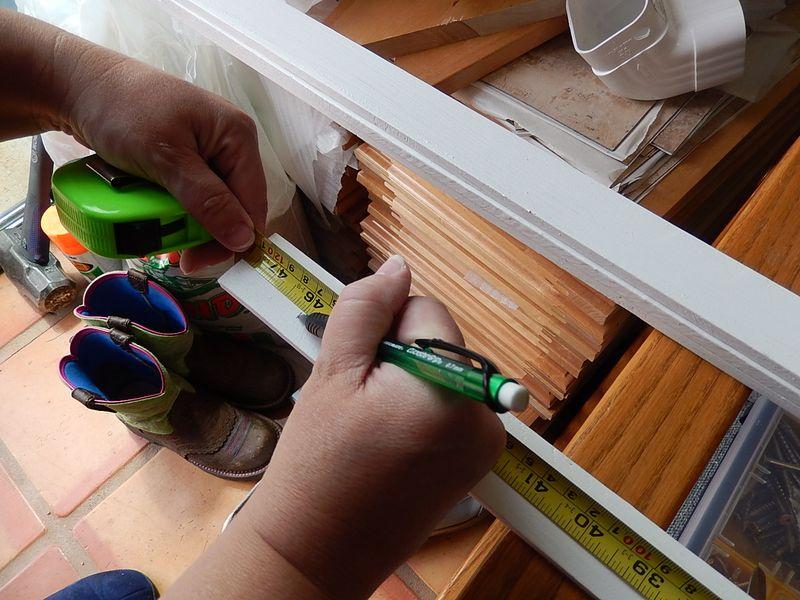 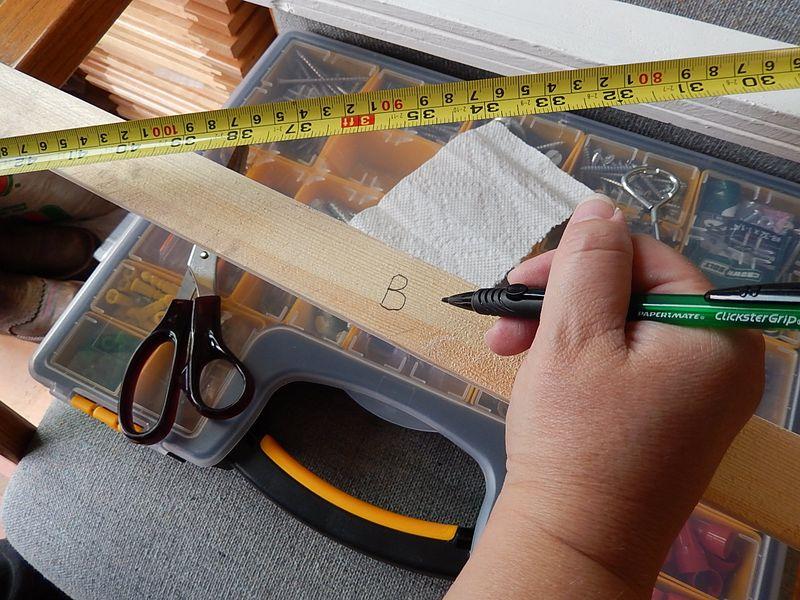 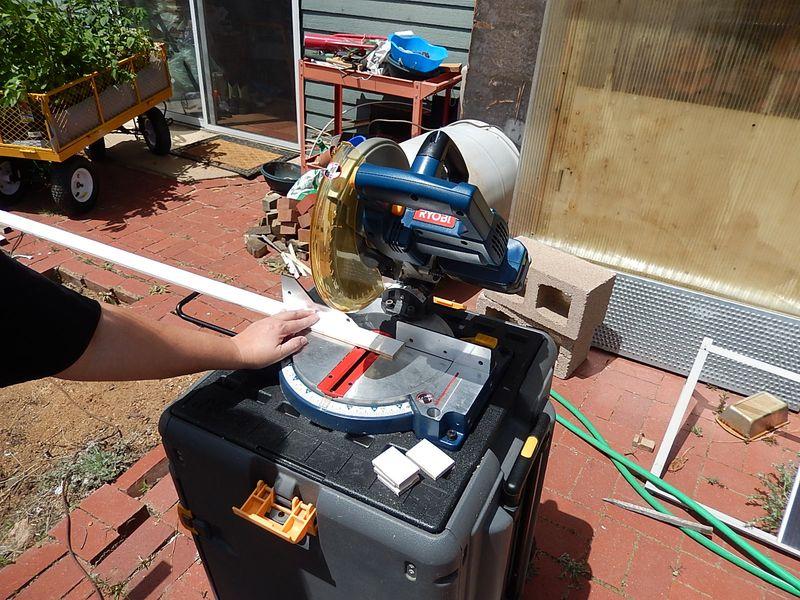 Then on to the fun stuff. Power Tools! While most any method of cutting would have these thin slats ready to go in no time, I headed straight for the miter saw since it gives 90 degree cuts with the most ease. Then on to the fun stuff. Power Tools! While most any method of cutting would have these thin slats ready to go in no time, I headed straight for the miter saw since it gives 90 degree cuts with the most ease.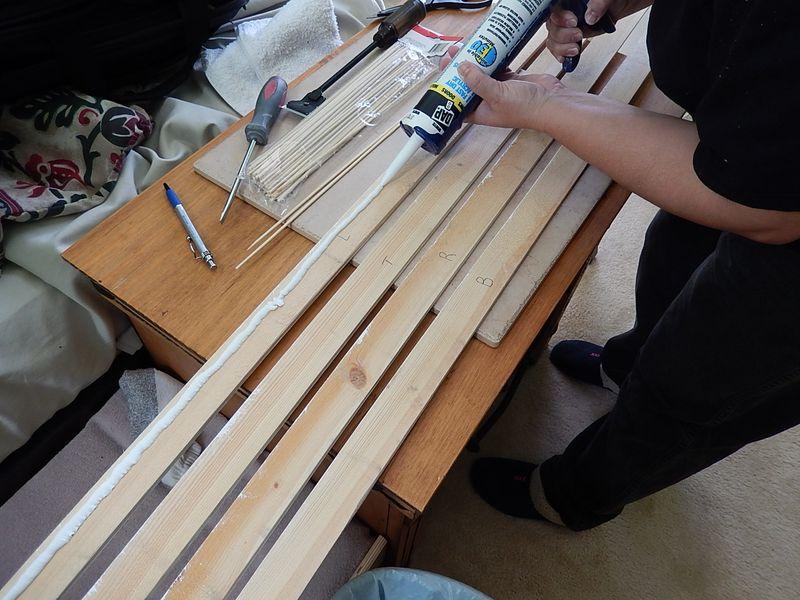 I added a thick bead of caulk to the forward section of the slat. Why near the front? Because if it were in the middle or back, it would probably have just gone in the giant crack and not stuck to anything. And of course, on the second window I thought I could add the caulk to them all at once. Then realized the aforementioned issue of not reducing the measurement on the sides and having to rush outside while wiping off caulk to cut them down and by the time I put on the last piece, the caulk was much harder to smoosh flat. Not a great idea. I added a thick bead of caulk to the forward section of the slat. Why near the front? Because if it were in the middle or back, it would probably have just gone in the giant crack and not stuck to anything. And of course, on the second window I thought I could add the caulk to them all at once. Then realized the aforementioned issue of not reducing the measurement on the sides and having to rush outside while wiping off caulk to cut them down and by the time I put on the last piece, the caulk was much harder to smoosh flat. Not a great idea. Note to self: One at a time, and don't get caulky. 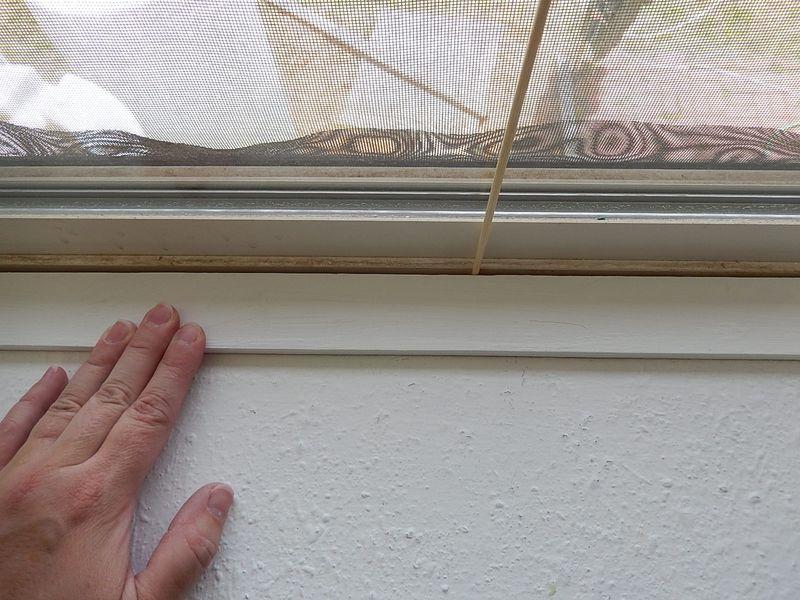 I used bamboo skewer-sticks to keep the slat a little ways from the window frame so that I would have room to fill with flexible caulk. Hopefully it won't crack when the windows flex from heat and cold, and it also makes a full seal so that air isn't coming into the house from the walls. I used bamboo skewer-sticks to keep the slat a little ways from the window frame so that I would have room to fill with flexible caulk. Hopefully it won't crack when the windows flex from heat and cold, and it also makes a full seal so that air isn't coming into the house from the walls.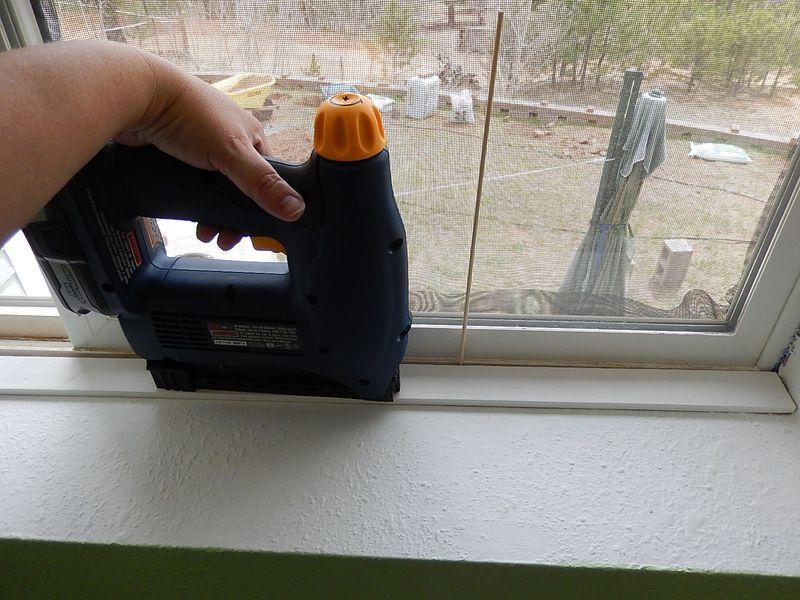 Several tacks with my beloved cordless brad-nailer got everything tight in place despite some difficulty holding the slat and the nailer at the same time, and then it was time for caulking. Several tacks with my beloved cordless brad-nailer got everything tight in place despite some difficulty holding the slat and the nailer at the same time, and then it was time for caulking. 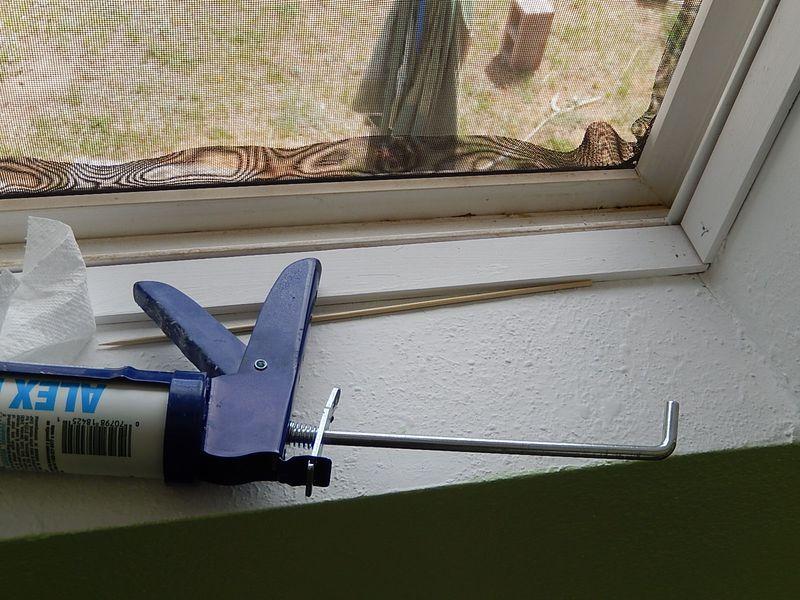 I have never been spectacular at caulking like the professionals, and when I did our new bath tub and shower, I had to use painter's tape and a spoon to get a nice smooth edge. However, I think I not only figured out why I have trouble, but also got this done very nicely. I have never been spectacular at caulking like the professionals, and when I did our new bath tub and shower, I had to use painter's tape and a spoon to get a nice smooth edge. However, I think I not only figured out why I have trouble, but also got this done very nicely. I have tiny hands and tiny fingers. Not small fingers, not slender fingers, TINY fingers. I have to wear children's gloves sort of tiny. So when the pro's caulk a bath tub and just rub it down with a finger, it is no wonder that it is a total disaster when I try to do the same with fingers half the size. However, here they finally came in handy. I put a very small bead of caulk on the edge where the slat met the wall and then was able to smooth it into place with my tiny, little fingers. Tiny caulk line... tiny fingers... it all fell into place. 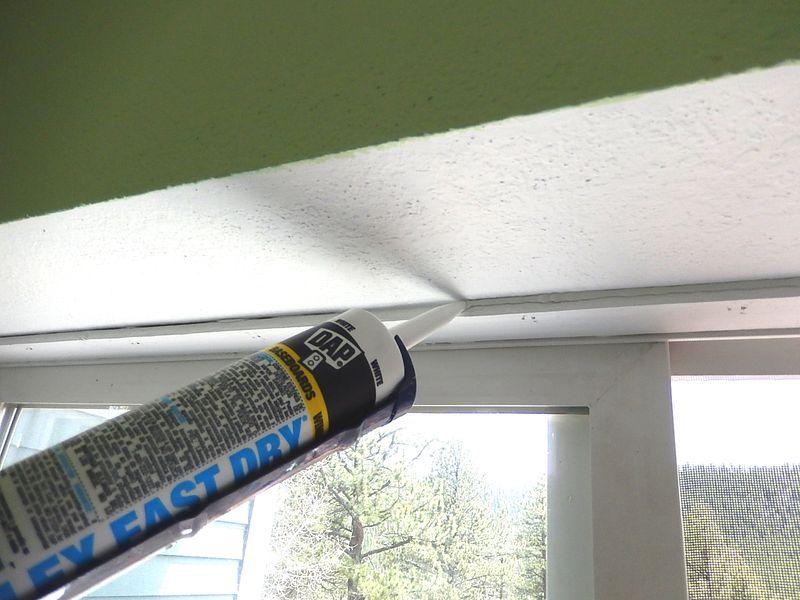 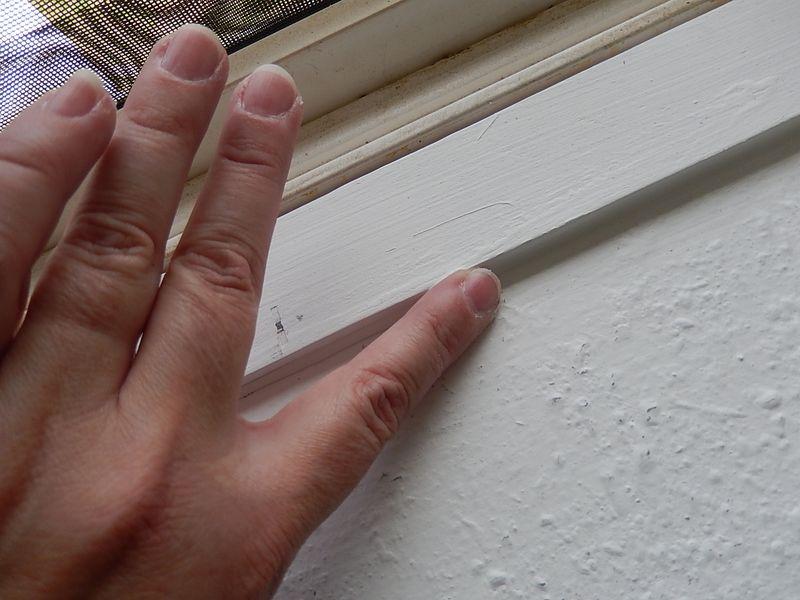 The inner gap between window and slat was more difficult and resulted in more than a few internal curses for the people who installed the windows with EVERYTHING crooked, but I managed to get it done without even falling off the ladder. Though hubby seemed to think I would at any moment and stood with a death grip on the ladder through most of the process. (Which was a good thing as I was standing with one foot on the window sill, one on the ladder, and it would have gone out from under me more than once if he had not been holding tight.) 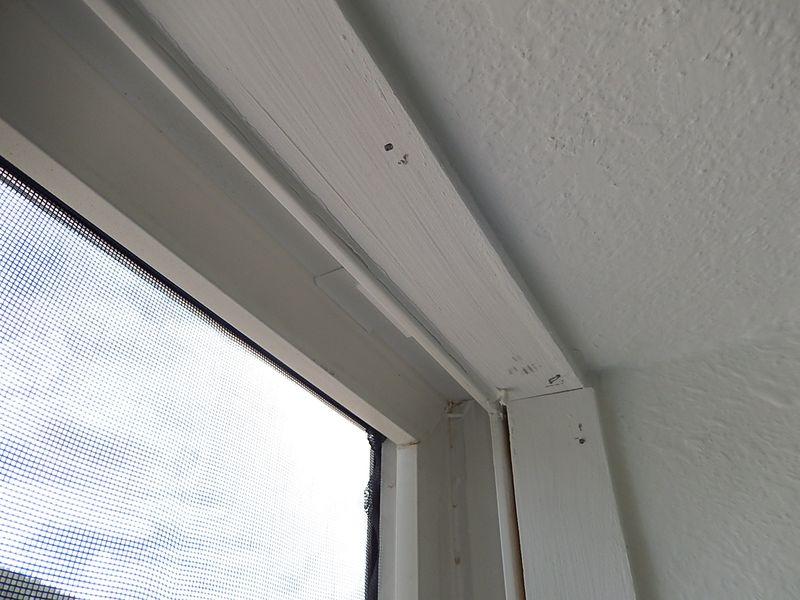 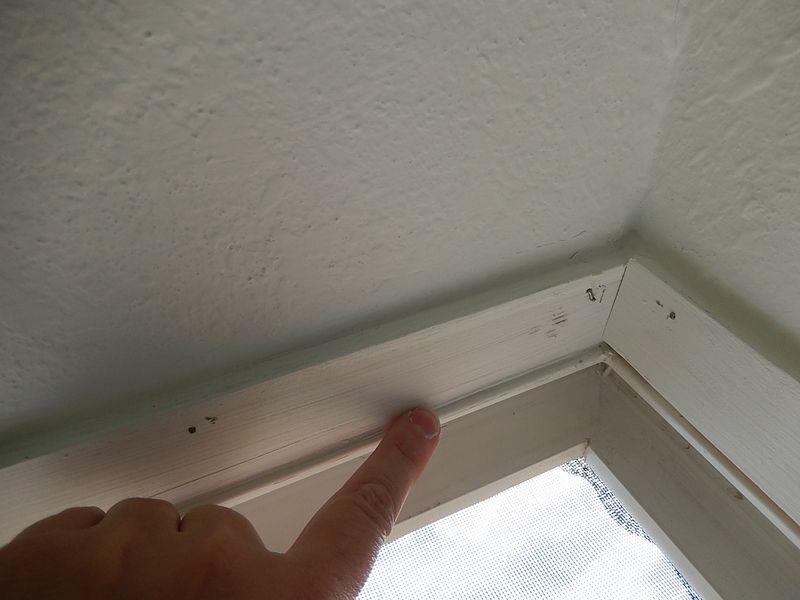 It looked good... or at least a heck of a lot better than it did before, and just needed to dry before the final steps of painting. 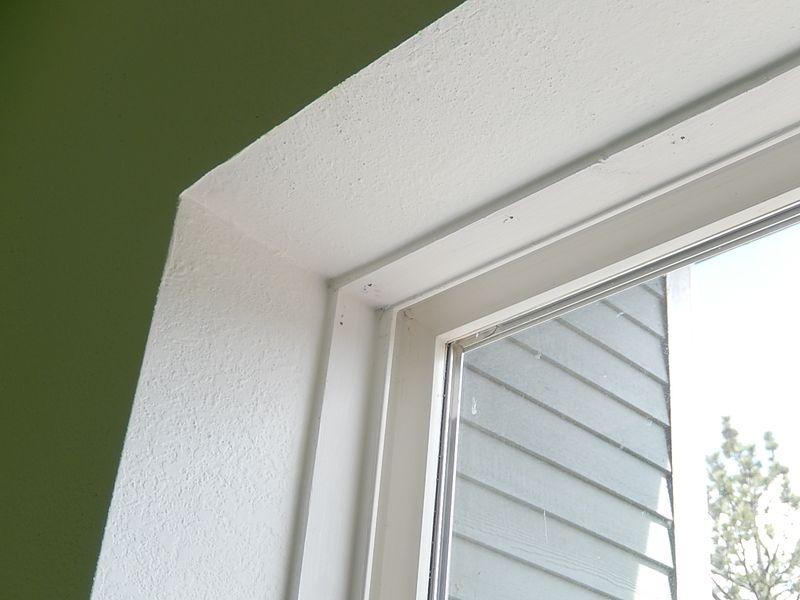 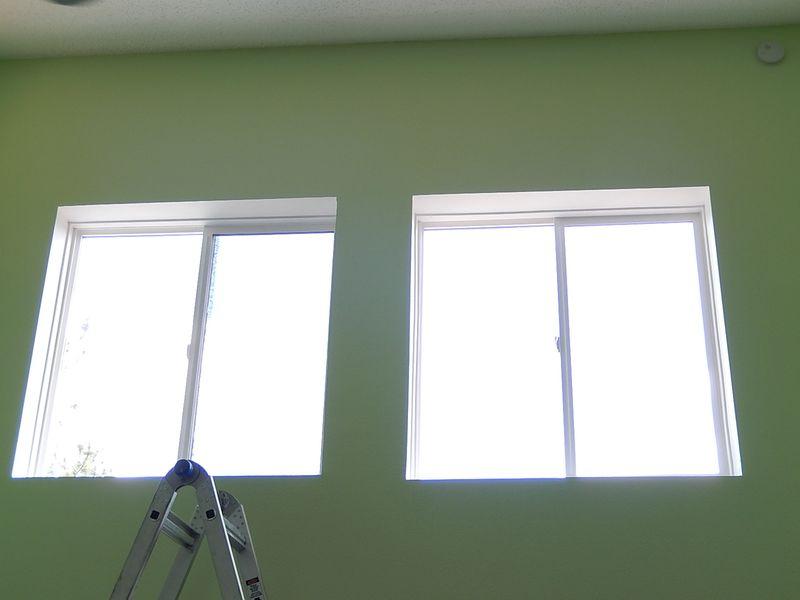 A coat of white took care of the nail heads and gave the needed second coat to the slats.  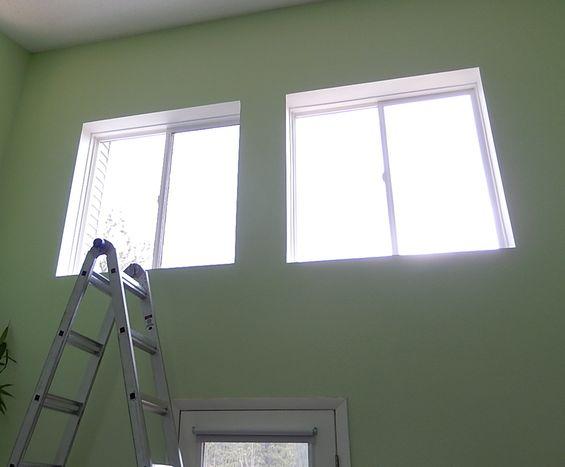 And finally today, sore and aching from a lot of digging, fencing, and planting, I got the coat of light green around the sides so that they would match the other couple windows in the room. 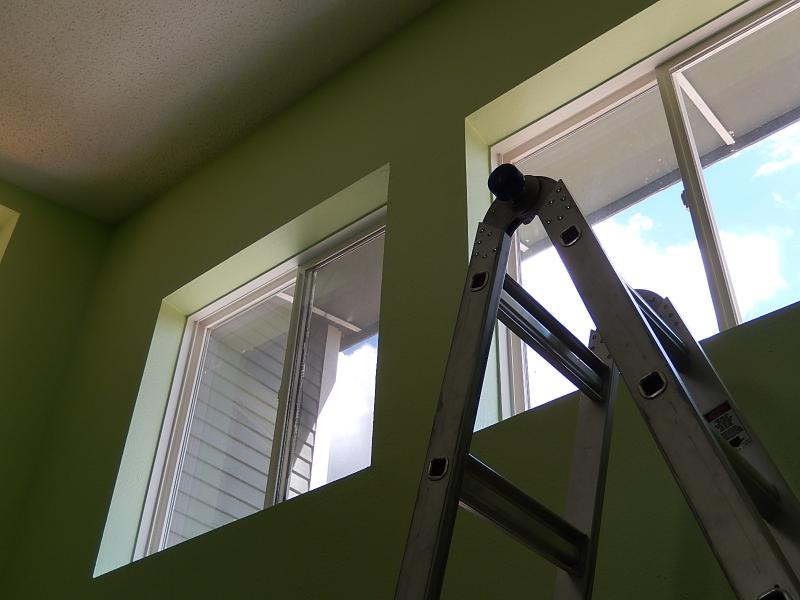 And now I PROMISE I will go rest... ..... ... for a while.
| |
|
POST LINKS FORWARD TO: 5/28/2014 6:14:43 PM - Gas Fireplace Trim | |
Next Post - Previous Post List View | |
Add Your Comment...


I showed your bedroom re-do to a friend Helen and boy was she impressed and wanted to see more of your work sooooo! we watched our bed and kitchen and bath and then the fish tank table and a few other projects like the ice cream cart. We ended up oohing and awing for over an hour. You, she said are "totally impressive."
Thanks for a great way to entertain friends!!