



| Next Post - Previous Post List View
| |
| 6/6/2014 3:33:45 PM How to Build A New Wii Sensor Bar Upgrade / Replacement | |
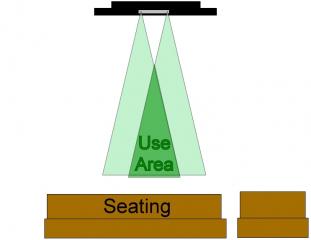
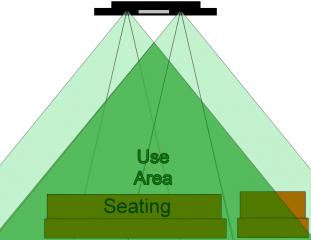
From the Archives: 8/8/2011 The Wii Sensor Bar that comes with the Wii has a relatively short range that can be a problem in a large room, and also has some trouble with correct cursor positioning on a large tv. With a little research I found that the "Sensor Bar" is actually just a couple infrared LEDs that the Wii remotes pick up to detect the position of the remote relative to the sensor bar. With just a little research and minor soldering skill, you can build your own wide-spaced sensor bar that also has a wide arc so that you no longer need to be almost exactly in front of the TV for a good sensor read. These pictures are not exactly measured statistics, but can give you an idea of the normal Wii Sensor Bar (Left) vs This Upgraded Sensor Bar (Right): Here is the general information on the build: Supply List:
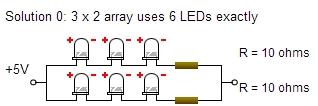
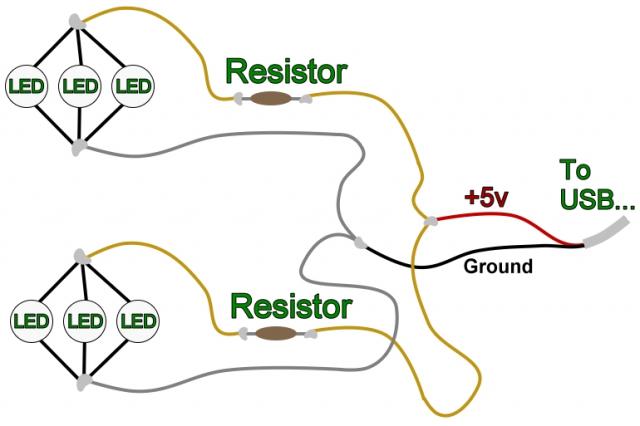
Upgraded Wii 'Sensor Bar' for extended range... near, far, and further to each side. With a large living room, we needed an extended sensor bar, but the ones available in the store were all battery operated and would use too many batteries for me. So I made a new one from one LED on each side, but it's arc was too narrow. Now I have three LED's per side and the range is great in all directions. This is the calculator site I used to determine LEDs and resistors for the circuit based on the voltage of a USB cable... http://led.linear1.org/led.wiz If you were good at soldering in small areas you could use their schematic and 10 ohm resistors. However I decided that the LED leads would be easier for me to solder together as a group, so I went with another solution and 68 ohm resistors. Here is a visual schematic I mocked up: ( The long stem on an LED is the positive and the shorter is the negative side. )
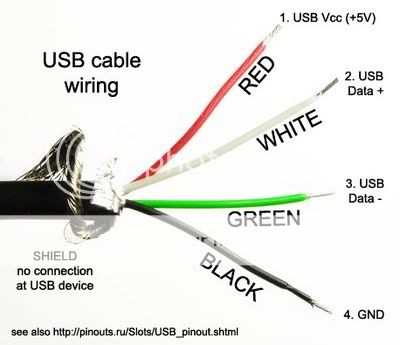
I drilled tiny holes for the LED prongs to extend through and then soldered them to the positive and negative leads on the speaker wire. In the USB cable, red is +5v (positive) and black is the ground (negative). The white and green are not used in this case as these are for data transfer, not power.
http://www.head-fi.org/t/455516/usb-cables-digital-signals-and-you-pt-1
Powered directly from the Wii USB port, the lights are only on when the Wii is on and there is no hassle of changing out batteries. The two resistors are located in the green shrink tube area where the USB line is split to go to the two 'sensors'. NOTE: All LED light can damage your eyes... even if it can not be seen, as in the case with infrared. Do not stare directly at LEDs.
I covered the open areas of the bottle cap with electrical tape to keep dust out and stuck them to the top of the TV with double stick tape. It can take a little trial and error to get the sensor sides placed at the right angle. This is easiest if you use the Wii's calibrate sensor bar screen while moving around the areas you want it to cover. It can be very helpful to have someone at the TV to adjust the sensors while you watch the difference it makes to your remote. Don't forget the up-down adjustment to make sure it works both sitting and standing. Working with electricity can be hazardous. Standard Disclaimer: Following any advice or information on this site is done "At Your Own Risk". Under no circumstances will Familyweb.us or TinkerT be liable for any loss or damage (including without limitation direct, indirect, or consequential loss or damage) arising from use or misuse of information provided in this website. | |
Next Post - Previous Post List View | |
Add Your Comment...


