






| Next Post - Previous Post List View
| |
 | 7/11/2014 12:13:24 PM Concrete: Step by Step |
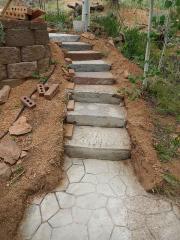
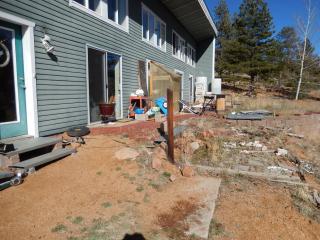
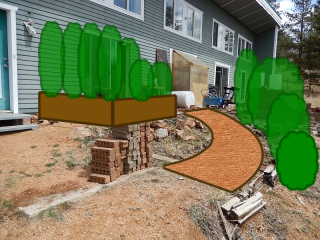
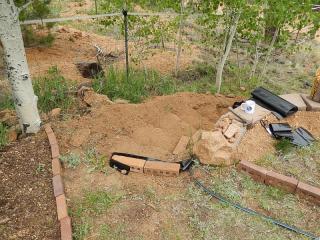
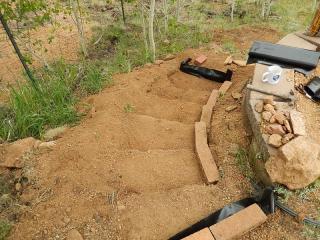
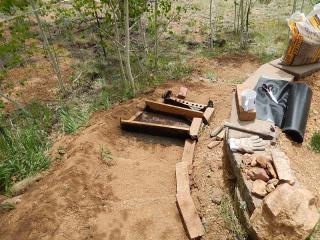
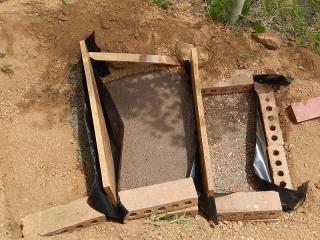
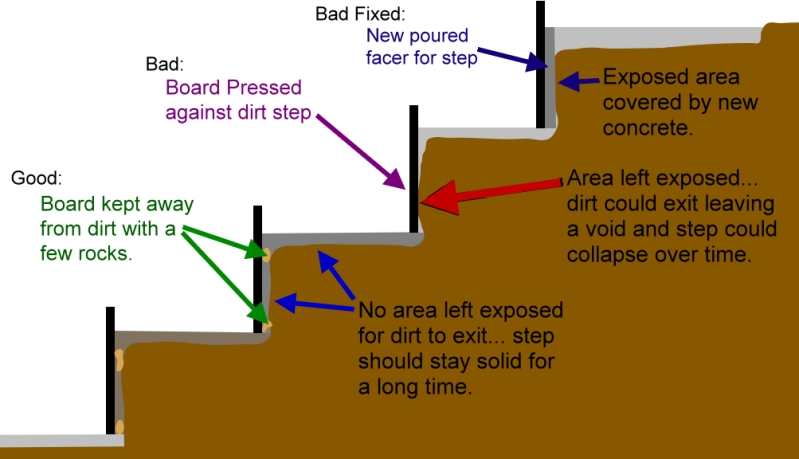
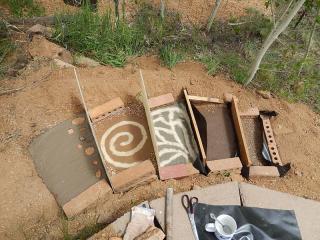
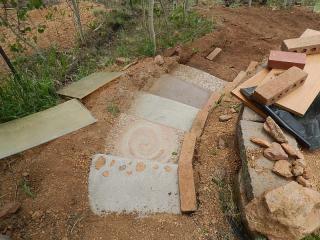
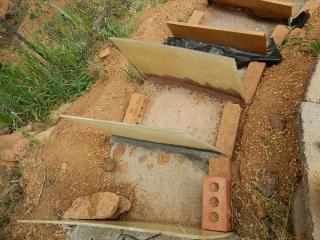
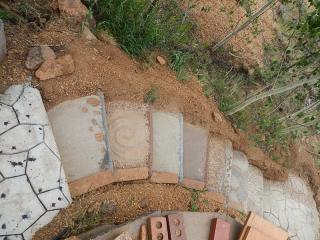
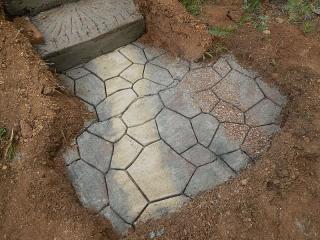
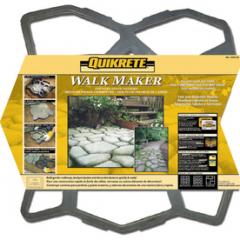
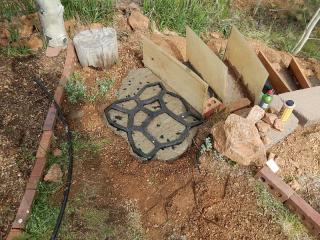
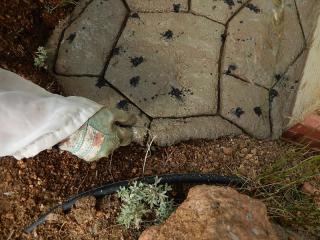
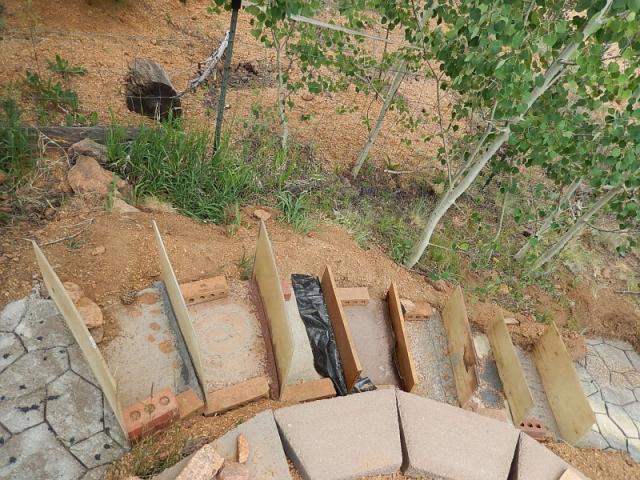
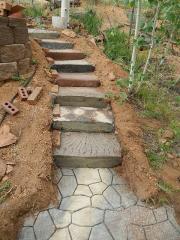
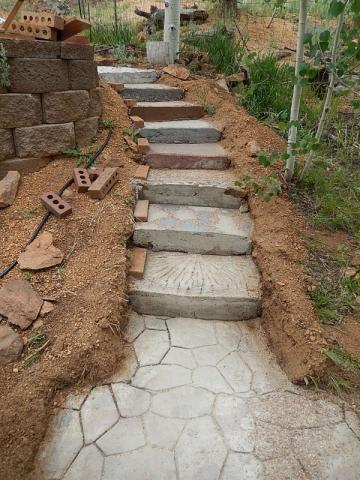
The first step to turning this........... Into This.............. Is literally "making steps". I calculated that this walkway-ramp project could cost upward of $200. And at that cost, hubby and I needed some testing done to decide exactly which method of concrete would be the best fit for a permanent and very noticeable addition to our yard. Not something we wanted to jump into and then be unhappy with later. So for anyone not used to all the modern concrete options, you might think... "What is there to test? Gray... or gray?" But today's concrete options are sky high if you have a professional pour it, and at least ten-story if you want to do it yourself. Beyond stains and colors that can be painted on later (something we decided would not be best in case of chipping and heavy wear), there are also colors that you mix with the concrete, and almost never-ending ideas for patterns and finishes. Imagination really is the limit. 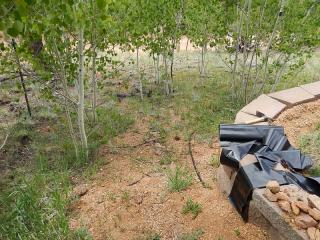 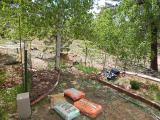 So my first thought was to make a few stepping stones with different colors and patterns so that the "test" work could be used for something. But after deciding I would use these tests stepping stones to improve a path from our upper yard to what will eventually be a nice bench and a couple seating areas in the shade of our mid-yard, it was easy to see that the tests would be better poured right in place as steps in a curve around the retaining wall of the upper yard. So my first thought was to make a few stepping stones with different colors and patterns so that the "test" work could be used for something. But after deciding I would use these tests stepping stones to improve a path from our upper yard to what will eventually be a nice bench and a couple seating areas in the shade of our mid-yard, it was easy to see that the tests would be better poured right in place as steps in a curve around the retaining wall of the upper yard.I scraped the general form of the steps into the dirt because this was a test and we didn't want to have to fill the entire step with concrete, or it would end up costing more than the walkway-ramp that we were testing for. The dirt would give the shape and support for the 1.5 to 2 inch thick steps. I used long bricks on the inside edge to help me space the steps correctly and hold the form board in place for the step above it. The first few we did ended up with bad fronts because I did not think ahead enough to realize that if dirt could escape from underneath them that the structure could collapse. ( Bad ) On the later steps I realized that by placing a few small stones between the dirt and the forming board, the concrete could be poured in front of the steps and seal in the dirt. ( Good ) To fix the first steps with the exposed dirt underneath, I had to pour an additional section onto the front of each of the steps to keep the dirt in. ( Bad Fixed ) I hope this addition will stick to the original concrete well enough to stay long-term, but they will never be as strong as the steps that were poured with the front filling at the same time. Here is a visual of what I am talking about: You can also see from this picture that if you pour the bottom step first, then you can let it firm up a little and add the next step shortly after by placing the next form board on top of the firm concrete. You can see in the next picture, the bricks we set on the firm step to hold up the board of the next step. This was the first Saturday of steps... (each of which needed additions to their fronts when we started the next weekend.) Hubby did a lot of the concrete mixing while I poured, smoothed, and set the design in the steps. Then we did the same for the rest of the steps and a platform at the bottom this last Saturday. Here you can see the fixes for the front of the original steps... I had to use a small trowel to scoop the concrete mix into the front, then poke it a lot to reduce bubbles and fill the space fully. We ended up making several more steps than we originally intended, but we kept thinking of more methods to try out and bags of quickcrete were on a very good sale, so we could make more steps for about three dollars each. And of course, making mud pies that won't wash away is pretty fun (if backbreaking) work. In addition to the individual steps, we poured a little platform at the bottom so that we could test out our plastic form from Lowes, too. While the directions show placing this form flat on the ground and then shoveling concrete into the openings, I didn't want to have fully separate stones that grass and weeds would grow between. So we poured the concrete with color blobs, gravel section, and sand section, and then pressed the form into it by standing on the middle and pushing down the edges down carefully with one foot. After pulling up the form, I used a wire and trowel to "cut" the uncut sides into the stone pattern as well. I also used the form to cut the top step in the same way, and a wire to cut the edges. ( Remember to always wear gloves when working with concrete... the chemicals in it can really strip and damage skin. ) I gave it several days to firm up and I sprinkled with water several times each day to help strengthen the concrete as it set. Then I removed the front form boards (plastic, and wood-wrapped-with-plastic) and continued to sprinkle it with water several times a day while it finished curing. Finally came time to sweep away excess sand and gravel and have a look. Here is a break down "step-by-step" of the finished colors and designs... 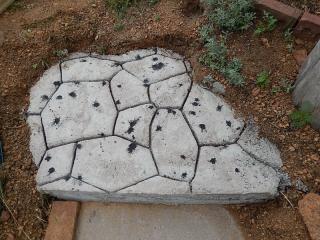 First step (top platform)... Base color brown (mixed medium strength) with somewhat watery gray topping plopped in with a trowel and then smacked into semi-rough texture with the trowel. Then dalmatian dribbles of charcoal color directly from the bottle. Then cut with the form. First step (top platform)... Base color brown (mixed medium strength) with somewhat watery gray topping plopped in with a trowel and then smacked into semi-rough texture with the trowel. Then dalmatian dribbles of charcoal color directly from the bottle. Then cut with the form.While the brown color dried lighter than I expected, this is probably my favorite style for the texture of the top. It is uneven from smacking it with the trowel, but not uneven enough to cause any problem walking on it. This gives it much more the texture of stone than flat concrete on the surface, and I am also fond of the brown-gray mottling though I would probably use gray base and full-strength brown for the surface plops to give it more color. I would not use the charcoal dalmatian spots again, because while they looked very cool when wet, I don't care for them on the dry concrete. 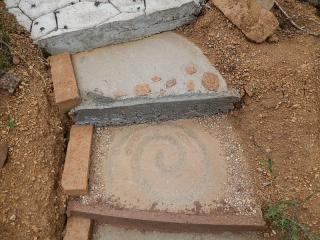 Second step... Plain gray base with one inch brown topping (mixed light) and local stones pressed into the front edge. (Front added in charcoal later) I had been hoping that we could buy less color by using a dark brown and adding only a quarter to the mix for a light brown. However, it is strange to find that if you mix brown in a smaller amount to the concrete, you do not get a light brown, but just a darker gray with a hint of mushroom color. Second step... Plain gray base with one inch brown topping (mixed light) and local stones pressed into the front edge. (Front added in charcoal later) I had been hoping that we could buy less color by using a dark brown and adding only a quarter to the mix for a light brown. However, it is strange to find that if you mix brown in a smaller amount to the concrete, you do not get a light brown, but just a darker gray with a hint of mushroom color. Step three... Plain gray base with one inch Buff color (mixed full-strength) on top with gravel pressed into sides and sand swirl pressed into middle. (Full brown added to front later.) This step is interesting to see the sand in a light but noticeable pattern on the buff color, though the color may be too close to our local gravel and blend in a little too much. 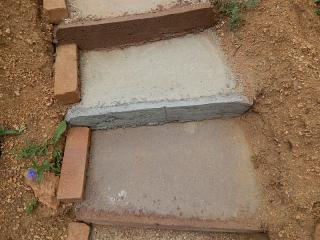 Step four... Plain gray with random sand pattern pressed into top. (Front of charcoal added later.) Step four... Plain gray with random sand pattern pressed into top. (Front of charcoal added later.) 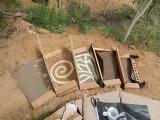 This step looked so interesting while it was wet with the sand on top, but the random sand pattern barely shows up at all once everything dried and the excess sand was swept away. While the sand gives the concrete a very gripping texture, it seems to blend in unless the pattern is very distinct. This step looked so interesting while it was wet with the sand on top, but the random sand pattern barely shows up at all once everything dried and the excess sand was swept away. While the sand gives the concrete a very gripping texture, it seems to blend in unless the pattern is very distinct.Step Five... gray base poured with one inch brown (mixed full strength) on top. (Extra strong brown added to front later.) This step was the second to be poured and the first to test if using plain concrete for the base layer and adding a color layer on top would work. It worked very well when carefully added and spread on top and could save a lot of money in dye costs instead of adding color to the entire slab. Though it needs to be added while the base is still barely firm, or it could cure separate and crack away from the base. While the topping worked perfectly, I am not terribly thrilled with the full brown solid color. It is just generally plain and has the slightest maroon tint in certain lighting. I think it will be nice mottled with gray, but not terribly great all on it's own. 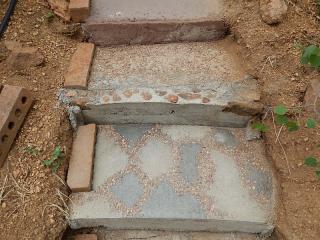 Step six... Plain concrete with pea-pebbles pressed into the top. (Plain front added with native stones later.) This step was the bottom of the first steps we poured and was much too narrow after we decided to pour more steps lower down. To fix this we poured a much larger front to it to make it a similar size as the others. It is probably the closest to plain concrete, but the pebbles spread on the top after the concrete started to firm up a little and then pressed in with a section of board, give the concrete added interest and increased traction. While probably the easiest method to change from plain concrete, it isn't quite interesting enough to be our final choice for the walkway-ramp. Step six... Plain concrete with pea-pebbles pressed into the top. (Plain front added with native stones later.) This step was the bottom of the first steps we poured and was much too narrow after we decided to pour more steps lower down. To fix this we poured a much larger front to it to make it a similar size as the others. It is probably the closest to plain concrete, but the pebbles spread on the top after the concrete started to firm up a little and then pressed in with a section of board, give the concrete added interest and increased traction. While probably the easiest method to change from plain concrete, it isn't quite interesting enough to be our final choice for the walkway-ramp.Step Seven... plain base with one inch charcoal top (mixed medium strength), then pebbles placed in rock pattern and sand poured on select areas. I tamped the pebbles and sand down lightly with the end of a small board. This is probably my favorite pattern next to those cut with the plastic form. It has a very intentional look to it and the pattern stands out nicely. However, I think this would also be one of the most time-consuming patterns to make in a large area, so it probably won't be what we use either. 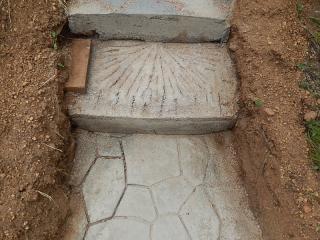 Step Eight... strangely, this step was the method I had the most hope for and also the one that turned out the furthest from my plans. The idea was to pour a plain gray step, then pour color in streaks and drag a wire through the surface to mix the color in swirls. The biggest problem with this is that I used the wrong color. Buff. Why is this a problem? Because the charcoal is almost black out of the bottle, and the brown is a really dark brown out of the bottle, but the buff... is orange. Not just orange, but seriously bright orange. And there was no way to tell just how orange the color would stay as things dried and cured. The second problem was that dragging a wire around the surface makes cut tracks, not swirls. Especially in the shallow 2 inches available. It might have been fine if using brown or charcoal in a deep bed of concrete, but I ended up with an orange and gray chunky mess. Step Eight... strangely, this step was the method I had the most hope for and also the one that turned out the furthest from my plans. The idea was to pour a plain gray step, then pour color in streaks and drag a wire through the surface to mix the color in swirls. The biggest problem with this is that I used the wrong color. Buff. Why is this a problem? Because the charcoal is almost black out of the bottle, and the brown is a really dark brown out of the bottle, but the buff... is orange. Not just orange, but seriously bright orange. And there was no way to tell just how orange the color would stay as things dried and cured. The second problem was that dragging a wire around the surface makes cut tracks, not swirls. Especially in the shallow 2 inches available. It might have been fine if using brown or charcoal in a deep bed of concrete, but I ended up with an orange and gray chunky mess.The best I could do to fix it was sprinkle water over the top and mix in the color. Then... without any better idea, I used the wire to drag lines from the edges to the center-back in a rough is-that-a-shell-or-a-waterfall-or-a-tree? pattern. Not my finest step, but it could be worse... it could still look like an orange was attacked by a ninja. 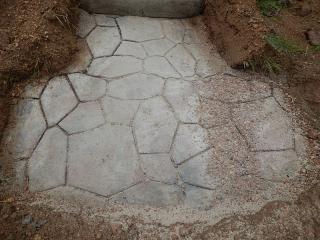 Bottom platform... Poured plain base and a few plop-splatters of brown and charcoal with the trowel. Then smoothed (which unfortunately blended away most of the color)... then added sand in one streak and pebbles in another. Then cut with the plastic form and edges cut with trowel to continue design. Bottom platform... Poured plain base and a few plop-splatters of brown and charcoal with the trowel. Then smoothed (which unfortunately blended away most of the color)... then added sand in one streak and pebbles in another. Then cut with the plastic form and edges cut with trowel to continue design.While I like the semi-lumpy of the top step much more than the smoothness of this, the bottom platform gave hubby and I good experience with getting the form to cut more than one section at a time. After each cut, the form is rotated one quarter-turn and pressed into the next section. Also, while I was not particularly fond of the less distinct areas with sand or pebbles, it was interesting when I swept the sand away that it filled the cuts in partially and gave the area less look of cut concrete and more like individual stones. However, I think I have an idea that would give this same effect without leaving sand for weeds to try and root in. Using a watered down bottle of the charcoal color and squeeze it right into the cuts to make them darker than the rest of the "stones". In any case, between this and the top platform, I am pretty sure we will use the form for cutting since I love the pattern it makes, and it is a breeze compared to any of the other more complicated designs I used. So while the hubby and I will still be talking it over more before starting on the walkway-ramp, I think we will probably use the following: Plain gray base with plopped full-strength brown, then smacked with a trowel to semi-blend the colors and create a more natural-stone texture to the surface. Then cut with the plastic form, and a darker color added to the cuts to make the "stones" more individual. One thing I will want to do before we proceed though, is to cut down a piece of plastic to match the profile of the plastic form edges so that I can use it to press in the edge cuts instead of trying to use a wire or trowel. I believe the edges would be smoother and match the plastic form better that way, as well as be much quicker than trying to get a perfect edge by scraping with another tool. So hopefully this can give someone some ideas about playing in mud that doesn't wash away... Boy is it fun to be an adult sometimes!
| |
|
POST LINKS BACK TO: 4/30/2014 12:44:00 PM - Landscaping Thoughts | |
Next Post - Previous Post List View | |
Add Your Comment...




What a large undertaking and with such charm.