


| Next Post - Previous Post List View
| |
 | 12/9/2014 10:21:48 AM Frugal Fan Fix For Ferociously Freezing Failing Fridge |
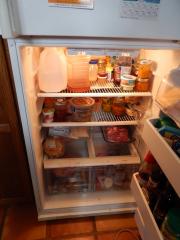
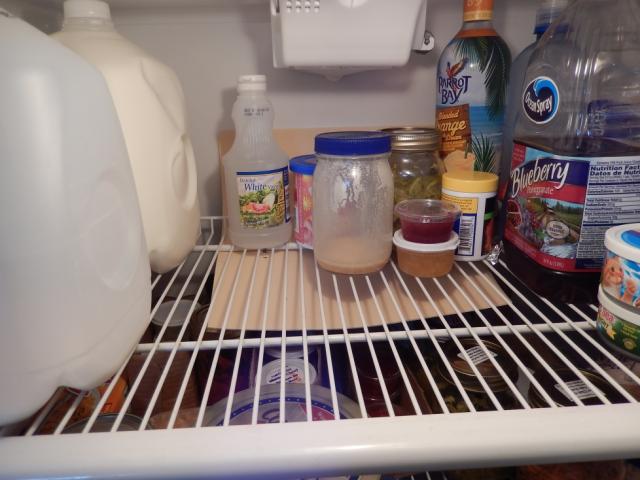
I actually did this mod/repair a while ago, but I wanted to be sure it would work well before I posted the how-to. We got this fridge when we first moved to the mountains several years ago. Used, nothing fancy, but in good condition. Sadly though, over the last two years it has gotten worse and worse about freezing everything in the back and produce bins and leaving the rest not cold enough. I started moving things around a lot to try to keep everything at the right temperatures, but with hubby home and often the one to put away the groceries, it was really only a matter of time before we had nothing but a virtual block of ice throughout the fridge. On a separate note... a great "thaw tray" can be made by just picking up an extra 9x13 glass (pyrex) cake baking pan from a thrift store for a buck or two and leaving it in the fridge. Put fresh-from-the-store or meat you are thawing into it instead of on your fridge shelf and all the juice that might leak out and cause a full fridge clean-out is caught in a easily washable tray. In any case, with careful placement no longer being adequate for freeze prevention, I started researching online for what was wrong and how to fix it. The first thing I found is that often people have their fridge coldness turned up too high or too low. Now the too high is easy to understand. Too high = too cold... and things freeze. But the too low? Really? But after I read a little more it does make sense if you are freezing mostly on the bottom of the fridge. You are cooling your fridge to a level that the cold air in the bottom settles and never reaches up to the top where the thermostat is and so the fridge constantly keeps dropping more and more cold into the fridge to fill it up. So I fiddled with the controls for several weeks and while finding that things in the bottom and back would freeze up but leaving other things too warm, I also tried out a placemat cut and placed under the top shelf and up against the back of the fridge. This kept the cold air from just dropping right down the back and helped to spread it out around the rest of the fridge. It actually worked pretty well, when the fridge was at an exactly medium-fullness. However, things still froze unevenly if the fullness wasn't at an exactly medium level. The next thing I found in research was that if the adjustment of the temp controls doesn't work... it is quite likely that the tiny fan that should help circulate the air in the fridge so that all the cold doesn't just drop to the bottom and stay there, has failed for some reason. This described my issues pretty spot on. Unfortunately replacing it myself didn't sound like something a home owner could do easily, and a repair-man visit would outweigh the value of the fridge very quickly. On the other hand... buying a new, or even newer used, fridge was also a cost that I couldn't dish out right now. So... if a fridge fan failed, fan the fridge frugally..... Okay... so enough with the tongue twisters. Having a computer guy for a hubby means that I often have PC parts laying around, and liking to do electronic projects means I know how to use them. Supplies:
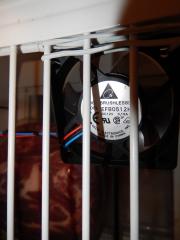
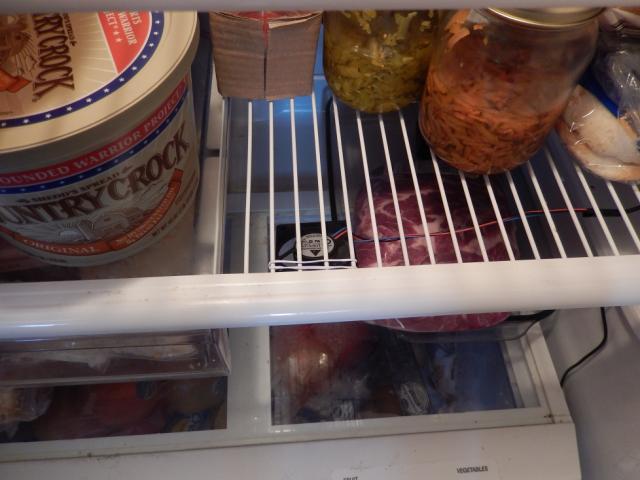
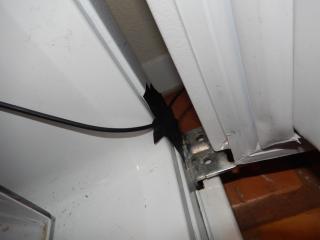
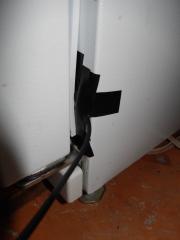
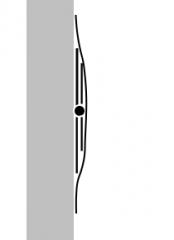
First... the voltage (V) out on the power supply should match or be LESS than the fan. Less will cause the fan to spin slower, but too much less may not be able to start the fan spinning. Second... the amp (A) or milliamp (mA) MUST be greater (preferably by 20% or more) than the fan. If it is not, the power supply could over-heat and even possibly cause a fire. So for a fan marked 12V and 0.15A (150mA)... A power supply marked 4.5V-9.5V and 800mA will run the fan slower than maximum and well under any risk of overheating the power supply. A little trial and error will give you the correct wires to connect from the power supply to the fan wires (make sure it spins in the right direction to move air), and a little electrical tape and heat-shrink tubing will give a nice finish to your wires. Then I attached the fan under the middle rack of my fridge with an extra-long bread-tie angled so that it blows a very mild flow of air back and up towards the control box at the top of the fridge. This small flow of air is enough to keep the temperature in the fridge fairly even, and to prevent loss of cold air where the cord runs out of the fridge, I built a smooth bridge of electrical tape layers so that the seal would still press smoothly without air escape. ( The graphic shows how this works, but in reality there are not the gaps that it shows because the tape lays so flat against the previous piece. ) How does it work? Great!... as long as I can keep hubby from putting groceries right over it. The major drawback to this fix is that at least a couple inch space around and above the fan must be kept clear or the fridge will go right back to freezing everything. However, as fixes go, this one has saved us the cost of a new fridge or expensive repair-man visit and only sacrificed about 6x4 inches of fridge space. Additionally, the very small cost of running the fan is probably outweighed by the savings we get from the fridge not trying to run so much more to freeze everything. Not too shabby. ( Something to note if you are trying this fix... a stronger fan could blow out a lot of your cold air each time you open the fridge, so barely enough to circulate the air is better than a stronger fan. )
| |
|
POST LINKS FORWARD TO: 2/12/2016 1:10:08 PM - Cleaning Up My Act and New Fridge Adjustments | |
Next Post - Previous Post List View | |
Add Your Comment...



There is no end to your creativity so I will just anticipate another project and another and another. How Fun!!