


| Next Post - Previous Post List View
| |
 | 5/27/2014 12:29:46 PM What Paper Mache and Fencing Have in Common |
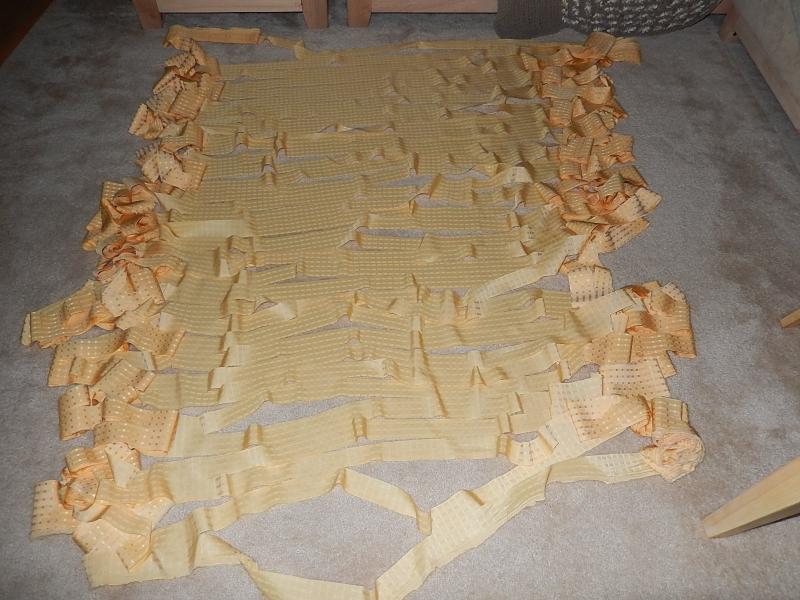
Since I am itching from sun-burn, sore, and my right arm from elbow to finger tips is alternating between numb and burning pain from the long weekend of landscaping, I decided that making some blog posts might be easier than finishing some needed house projects today. So here is how to turn a 5 foot wide cloth into a 10+ foot wide cloth... that I used on the most embarrassing fence I have ever worked on. 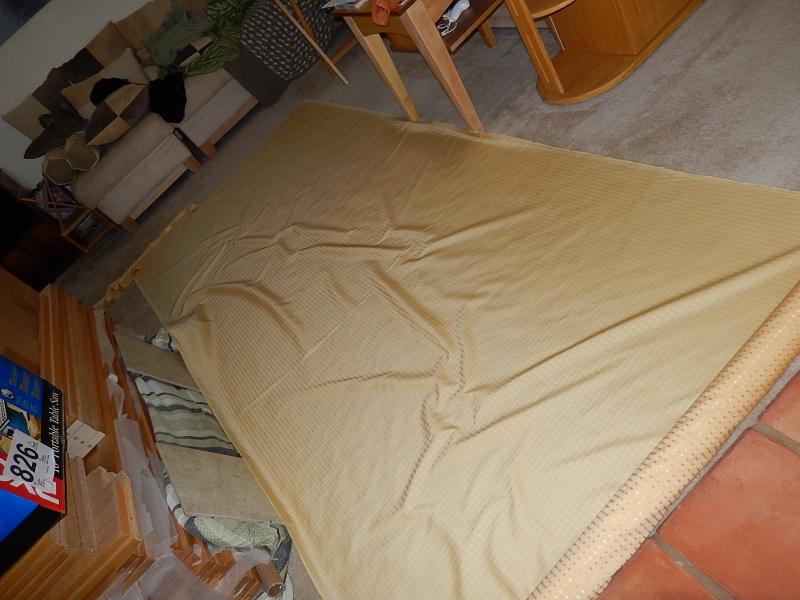 First, select your material. Since this was going outside to top a bush garden and prevent deer from getting in, I selected a light weight but strong nylon. How long will it last outdoors? I don't know, but I hope for a full season. I tested the tear directions and was happy to find that while it would tear a little if sliced width-wise, it did not tear much at all if cut length-wise (the direction I would need to cut it to expand it in width). First, select your material. Since this was going outside to top a bush garden and prevent deer from getting in, I selected a light weight but strong nylon. How long will it last outdoors? I don't know, but I hope for a full season. I tested the tear directions and was happy to find that while it would tear a little if sliced width-wise, it did not tear much at all if cut length-wise (the direction I would need to cut it to expand it in width).Second, fit your budget. My budget for this project was $0. Hence why I didn't just go buy two rolls of fencing and put where I needed it. I already had the material on hand and had gotten the material on a super-clearance sale for 65 cents per yard. So the whole thing cost me about $6.50 of material that I already had on hand. Proof of concept. I first cut a small section and did test slices alternating from each side. Then I laid it out expanded to the estimated 10 ft that I would need for the width of my bush garden.      Estimate Length. The measurement of un-expanded fabric was 14 inches and the expanded was an average of 10 inches, so with some quick calculations I was able to guesstimate that to stretch to the 10 foot width needed, I would need about 28 foot of material to get the 20 foot length. 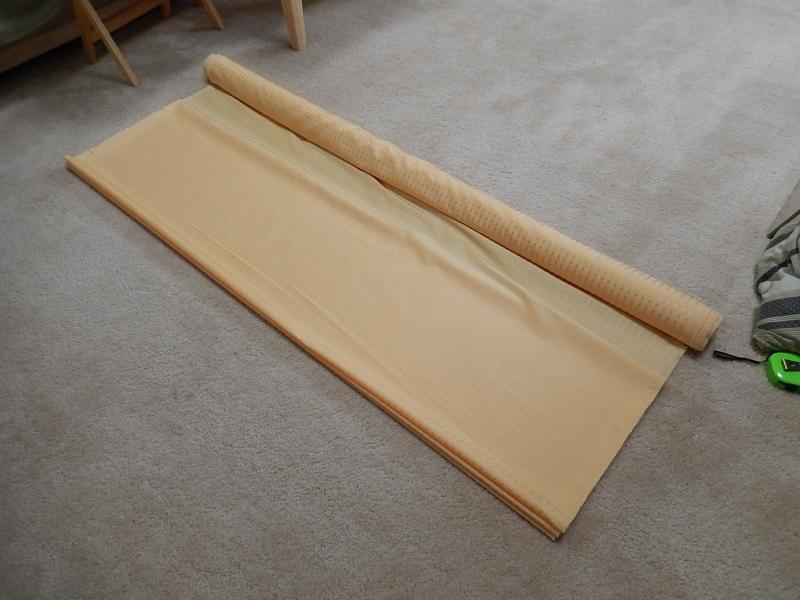 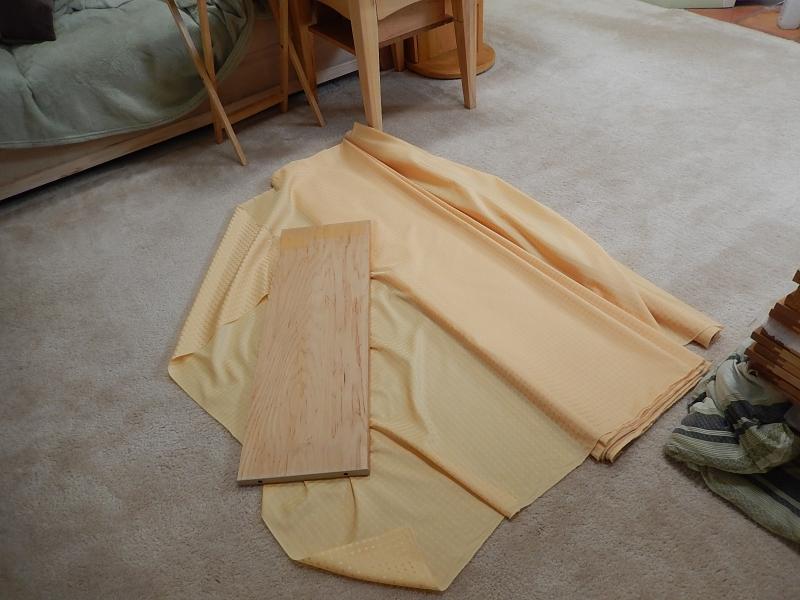 Fold the Fabric. First I tried folding it without any structure inside, which worked miserably, but then I found a board with close to the right width and wrapped the cloth around it 31 times. Any one see a problem with this? Yes, you probably guessed it. Now there was no way to pull the board out of the middle. Fold the Fabric. First I tried folding it without any structure inside, which worked miserably, but then I found a board with close to the right width and wrapped the cloth around it 31 times. Any one see a problem with this? Yes, you probably guessed it. Now there was no way to pull the board out of the middle.After making a lot of frowny faces at it, I waited until hubby got home to give me the extra set of hands needed. We folded 16 folds as we unwrapped the board, and then at that point the board was able to be pulled from the center of the rest giving me two sides that were reasonably able to be cut with very sharp scissors.  Cut the Fabric. I cut the slices as a mirror image in each stack... alternating from one side and then the other like I did in the test. Then folded the sides back to reveal the center and cut the final slits in that center piece one at a time. If I had not made a mirror image, the center cuts would have been off-set and the center would not have been able to expand like the rest of the fabric. If I had been doing a shorter length, I would have done it all in one folded set so that I would not have had to burn out brain cells to ensure my center would get cut right. Cut the Fabric. I cut the slices as a mirror image in each stack... alternating from one side and then the other like I did in the test. Then folded the sides back to reveal the center and cut the final slits in that center piece one at a time. If I had not made a mirror image, the center cuts would have been off-set and the center would not have been able to expand like the rest of the fabric. If I had been doing a shorter length, I would have done it all in one folded set so that I would not have had to burn out brain cells to ensure my center would get cut right.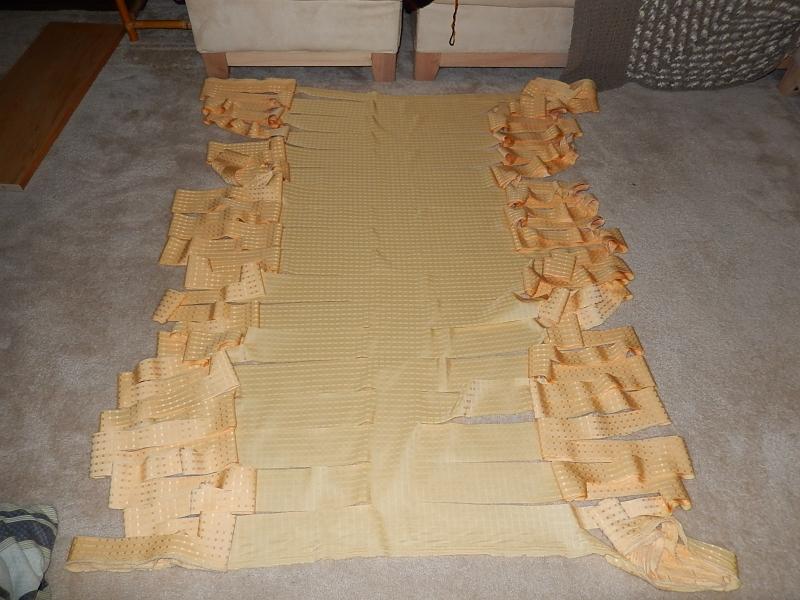 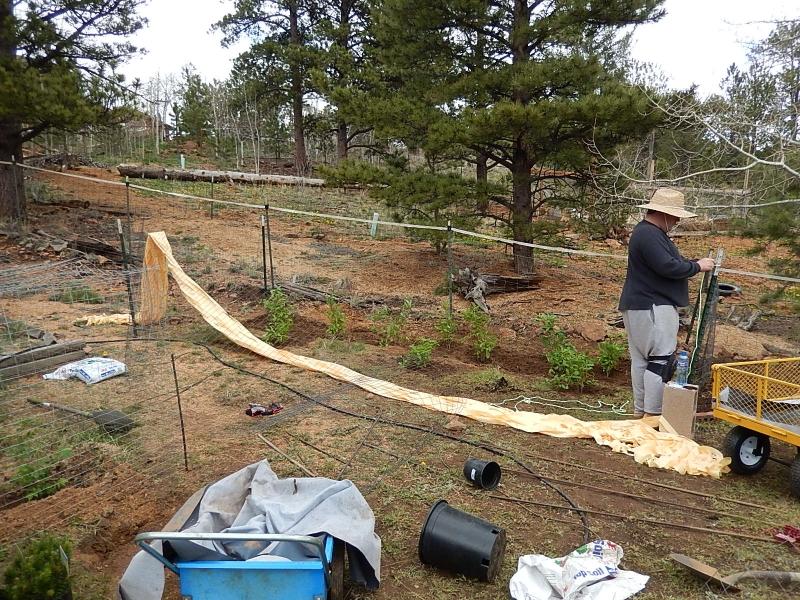 Install. Hopefully if you are doing this, you are putting it somewhere that makes more sense, but I was making a top for a bush garden, so.... After we finished the wire fencing for the sides and front "gate", we pulled the fabric across the area and then stretched it out from side to side and I tied the ends to the fence on one side while hubby held it on the other, then tied off the side he was holding. It is wire-tied to the fence along the back and a rope on the front from post to post holds it without needing to be tied onto the gate. Install. Hopefully if you are doing this, you are putting it somewhere that makes more sense, but I was making a top for a bush garden, so.... After we finished the wire fencing for the sides and front "gate", we pulled the fabric across the area and then stretched it out from side to side and I tied the ends to the fence on one side while hubby held it on the other, then tied off the side he was holding. It is wire-tied to the fence along the back and a rope on the front from post to post holds it without needing to be tied onto the gate. 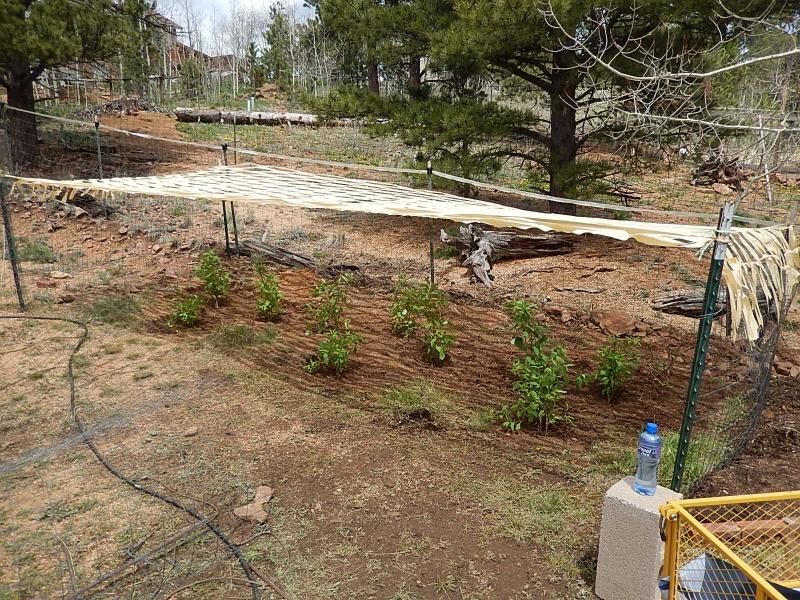 How did it work? Great! 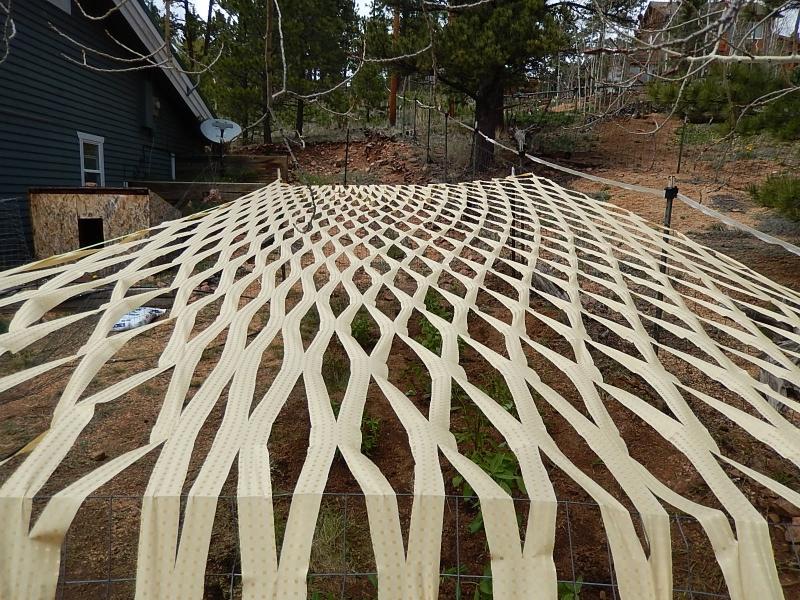 How well will it hold up? Who Knows! Note on Length... I ended up only needing it to expand 9 foot wide, so it was longer than it needed to be for the 20 foot, but better than being too short. (Just remember if you ever do something similar... the wider you need to stretch, the shorter the fabric will extend length-wise.)
| |
|
POST LINKS BACK TO: 5/27/2014 10:15:23 AM - Go Big or Go Loam | |
Next Post - Previous Post List View | |
Add Your Comment...


Are the bushes you planted the lilacs? Does the deer have a taste for lilacs or will they leave them alone once the protection is gone. Looks like this cover will last for a long time though.