A2 Hosting still has not fixed the Database after their servers failed AGAIN. A2 Hosting is the WORST!
Because of this, new posts are currently missing and I can only HOPE they eventually recover the table they didn't restore after their latest failure.


Next Post - Previous Post       List View


10/16/2016 1:19:48 PM

Step By Step - How to Build my Semi-Thein-Clone

DIY   ideas   tools   woodworking  


To preserve suction and reduce the cleaning of filters and containers of dust removal systems, you can add a pre-vacuum separator.  It removes large and (when done right) even small visible particles before they get to the shop vacuum.

Note that it is generally agreed that no separator removes the finest of invisible particles and a hepa quality filter and/or proper dust mask is still recommended if breathing the exhausted air from the vacuum, especially if fine particles may be present from sanding, drywall, or hazardous materials.

In a recent test, my own version of a Semi-Thein-Clone performed as well as the manufactured Oneida Dust Deputy, and out-performed it in suction tests.  (see more here)  And since it is so easy to build in comparison to the more complicated Thein Baffle, I thought I would give a quick step-by-step on how to build it.

My Semi-Thein-Clone is so named because it isn't quite a Thein Baffle (so named for the guy who first made it), and it isn't quite a Cyclone, but it uses parts of both.  

It isn't a Thein because the baffle is not high up to the in/out and has more than one single slot, however the bottom of the bucket with slots acts similarly to a Thein by dropping the debris out of the turbulent air flow through slots and keeping the turbulence mostly out of the lower container.  This prevents debris from getting churned up and returning to the air-flow.

It isn't a true Cyclone because it lacks the conical shape that the cyclones use to drop the debris through a central hole, however, it does use the longer spinning force and a extended center out-flow to create a cyclone like effect that forces the particles out of the airflow against the sides of the bucket and drop down through the slots.

Estimated cost of Collection Container:  $27 to $30
Estimated cost of Semi-Thein-Clone:  $10

Materials:
  • Collection container of some sort (20 gallon is a great size)
  • Plywood or other flat board wide enough for the top of your collection container (I used well sanded OSB)
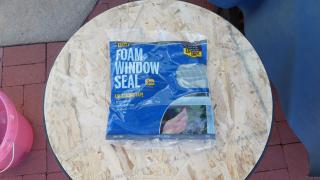
  • Thick foam weather stripping to seal between the wood and the container
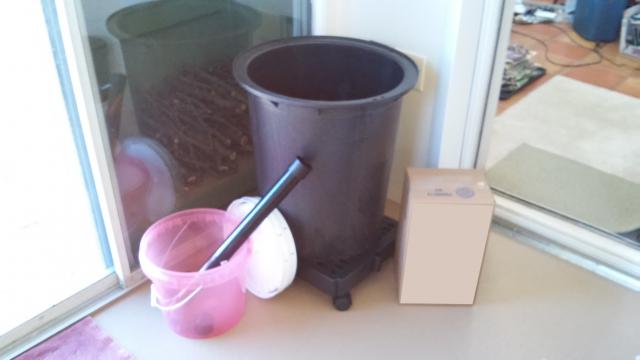
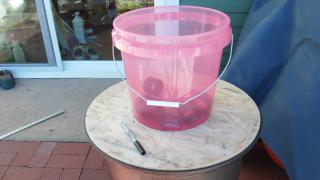
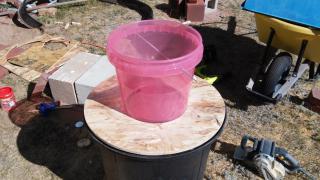
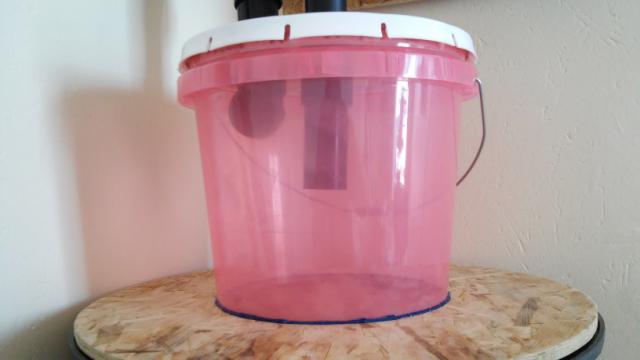
  • 3.5 gallon bucket (I found a transparent one at Lowes even if it is slightly offensive by being pink)
  • Bucket lid
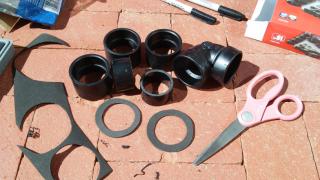
  • PVC... 90 degree elbow, three straight connectors, 8 to 10 inches of PVC pipe
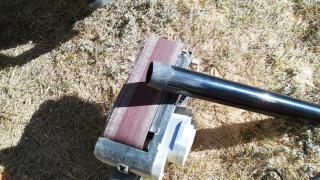
  • PVC pipe and/or connections that can be made to connect to your shop vac hoses  (they may need sanded to reduce or wrapped with tape to increase)

First, prepare your collection container...

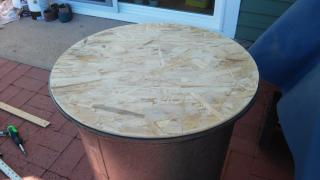
Many people use plastic barrels or metal trash-cans for this, however, with the potential of collapse from suction, it seems that re-enforcement is often needed.  You can use whatever you want, but I chose to go with a sump-pump basin.  It is surprisingly strong and equally surprising that it cost the same as a metal trash can of the same size.  It will need no additional support to prevent collapse, however, it is heavier than a standard trash can.


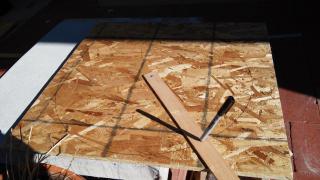
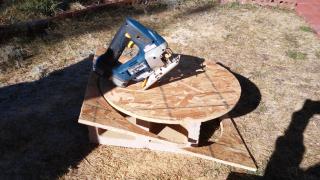
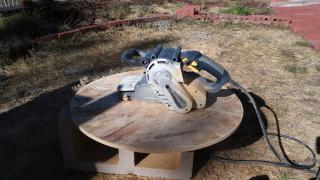
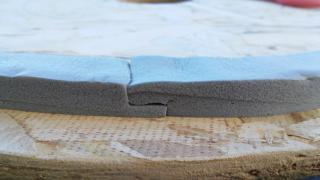
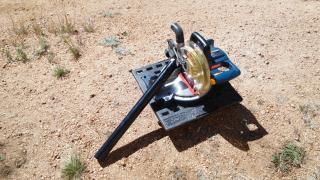
Cut a lid to fit or overlap as needed.  Sand smooth and add thick foam weatherstrip to create a seal between the lid and container.  You want this lid to seal well, but be easily removed to dump the collection container.  To get a good seal at the end point of the weatherstrip, cut the ends with a bottom half and a top half that will overlap.


Make the Semi-Thein-Clone...

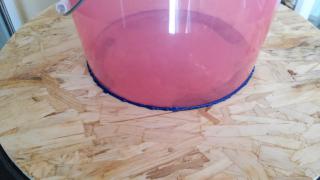
Trace the bottom of your 3.5 gallon bucket onto the lid (it doesn't really need to be centered, but looks nice that way).  Cut out the circle and sand if needed to fit the bucket base tightly into the hole.


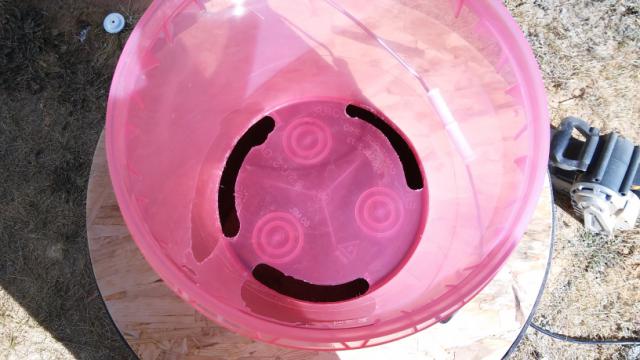
Cut 3 slots into the bottom of the bucket right at the edge.  My slots are around 3/4 to 1 inch wide and take up about 2/3 of the bucket bottom edge... anywhere close seems like it would work equally well.  While these slots obviously don't need to be perfectly spaced, having them even would look nicer and provide even support for the bottom of the bucket.  Mine are a bit random but work fine.  To make these slots, I used my palm router, but you could use pretty much any cutting tool.  Use a little sanding paper to smooth the cut if needed.  

NOTE:  It is very important to cut the slots right against the edge of the bucket side.  The debris needs to fall straight down the sides into the collection and will kick back up if it hits a ledge.


Then use some type of glue to seal the bucket base into the wooden lid.  Caulking may give the best seal, but I used hot-glue.  It could be heated if needed to be removed or something later.  (I would use caulk if I did it again)


Now Prepare the Lid...

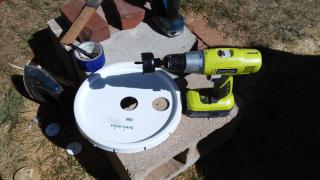
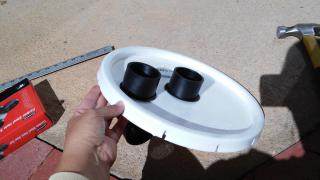
Cut one hole in the center of the lid that is just barely larger than the PVC pipe.  I used a hole saw, but you could use a jigsaw or other cutting device.  Then cut another hole about a half inch inside the bucket edge.  Cut two 1 inch rings of PVC to bridge the gap between your fittings


I then cut a little foam gasket to work as a seal while testing the system, but you can skip this step and move to gluing things into place.


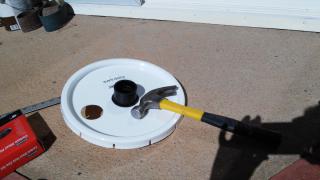
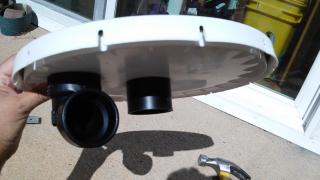
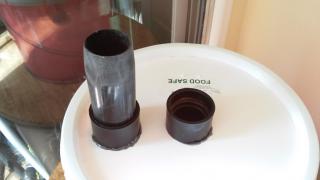
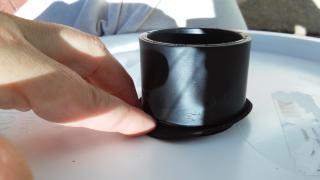
Put a PVC ring you cut through the center hole and attach straight connections on the top and bottom with PVC glue or some other type of glue to seal the piece into place.  You want a hammer on hand to smack the fittings tight before whatever glue sets.


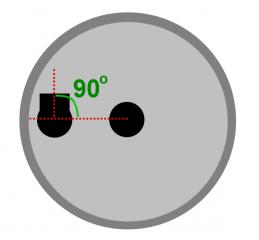
Then do the same to the side hole but use the 90 degree fitting on the bottom.  The best orientation I have found for it puts the fitting at a 90 degree angle from the inlet to outer edge, though anywhere from 75 to 90 degrees would probably work fine.


Cut a PVC piece between 4 and 6 inches (they both worked equally well so I would go with 5).  And install it on the center bottom.


What transition pieces you need for the top will depend on your particular shop vac hose size.  The outlet of mine fit by nature of the inner ring on the PVC straight connector.  However, the inlet needed a section of PVC sanded down to almost nothing to fit my shop vac hose.


Quick notes and questions:  

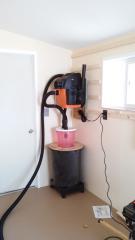
The center pipe goes to the shop vac and the outer goes to your suck-it-up hose or ducting to tools.

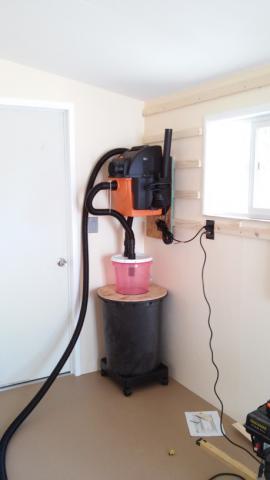
My hose can reach pretty much all areas of my tiny shop, so I am using a shop vac that attaches to the wall above the collector.  However, if you needed yours to roll around, a stable cart to put the vac and the collector on together would be a good idea.

Could you use a 5 gallon bucket instead of the 3.5?  
Yes.  However, the suction would be more likely to cause bucket collapse.  The shorter 3.5 has better structural integrity.

Could you use a solid color bucket instead of the transparent?  
Of course... but who doesn't want to see that sawdust go spinning around like a tornado?  Also, it makes seeing if anything is getting stuck on your slot edges or if the container has gotten too full obvious at a glance.

When do I need to empty the collection container?
I have not even come close to needing to empty mine since I am only a hobby wood-worker.  I have read reports online that similar systems only need emptied when completely full and starting to fill into the top Semi-Thein-Clone bucket.  However, I would really recommend emptying the collection when it is no more than 3/4 full.  Letting it completely fill and then start sucking into your shop vacuum would clog your filter and defeat the purpose of the collector. 

Would I sell this item pre-made for you?
No.  It is simple enough to build and if you really would rather throw money at it instead, you could check out the Dust Deputy (but you will need the kit, not the DIY version or you still have to build stuff).


Thanks for reading and hope this helps someone make an easy dust collector.


     POST LINKS BACK TO:
          10/16/2016 10:37:47 AM - Dust Collection and Suction Comparison with a Shop Vacuum


Next Post - Previous Post       List View
COMMENTS

4/18/2017 7:43:29 AM qtron
WELL Done. And great choice of testing "dust" too!
U put thien to shame in 1 swipe.. although I know he inspired U :-)
Just built my first thien type. Bah.. gotta try that medium outflow & narrower slots.
Might drop the Thien plate down lower to to see if that helps.
Am trying to filter concrete dust  - grinding self levelling concrete that didnt!.
Cheers,

4/18/2017 9:24:52 AM TinkerT
Thanks!  It took me a while to think of what "dust" would work to show up well on the filter pad.  Of course, later my dad asked me why I didn't just use the blue chalk from my chalk line.  I told him "Cause that would have been too easy, and would not have smelled nearly as tasty."  LOL

Good luck on your grinding... sounds like a pretty big project to get level.  And of course be sure to wear a good respirator.  I would guess that concrete dust would be a lot worse in the lungs than sawdust.

4/18/2017 4:55:56 PM Qtron
Yes shitty job, & very challenging.. had to know depth of flooring underneath & self levelling concrete thickness all over. Then had to devise a stratergy.
- Could send u pics of my grinding jig / setup if i knew how to post it here.
Hey that chalk powder a great idea!

4/18/2017 5:40:36 PM Qtron
Meant to say that concrete dust in vac motor will kill it.
Thats why am so keen to get the best separation possible. Gunna try "tontine" a synthetic pillow filler around vac filter to catch concrete dust. It isnt a fine filter but can be thickly used.

4/18/2017 9:22:44 PM TinkerT
Definitely can see it would be a problem for a motor.  Would a hepa filter take care of what makes it to the motor?

4/18/2017 9:37:52 PM Qtron
No. Unfortunately. Read elsewhere that drum sanders clog them!!
BTW
Hey why had ur hubby got a walkie talkie on his belt on ur wedding day?!!

4/19/2017 9:23:23 AM TinkerT
LOL... is actually an over-sized cell phone.  We were all just so used to seeing it there none of us noticed until looking at the pictures.

8/13/2017 2:39:01 PM Rhaugle
Are you still using this? Does it still work as well as the original test? Thinking about building one tomorrow!

8/13/2017 3:13:44 PM TinkerT
Yes!  I am petty sporadic about working in the shop and making lots of sawdust, but it still works just as good as it did the first day.  With my medium use I have not seen any loss of suction and have not needed to clean out the shop-vac filter yet, either.

Do note.... another person built one and had trouble with it collecting.... but he had put the cuts in the bottom of the pink bucket about 1 inch in.  They need to be flush with the sides to let the debris fall straight down the sides and not be knocked back up into the air flow.  :)

8/13/2017 9:02:15 PM Rhaugle
Thanks for the heads up! When I get some time tomorrow, I will be making this. Thanks for all your work! I thought about just buying the Dust Deputy kit, but the found a bunch of buckets that I'm going to turn into this!

8/13/2017 9:40:32 PM Rhaugle
Reading over the instructions again.. When you talk about preparing the lid... it looks like you have an "outer" piece of PVC (in the middle hole) and then a smaller (diameter) piece that slides inside the other PVC piece. Is that right? if so, why did you do it this way, and not just put one piece of PVC through the middle?

8/14/2017 9:51:48 AM TinkerT
It is done with pvc fittings and pvc pipe.  A straight pipe could be easily dislodged as your bucket or hose gets moved around, but by putting a fitting (straight connector), then a short piece of pipe through the lid and then another fitting (then the medium length of pipe), it locks the whole thing in place. 

The same goes with the incoming... straight pipe connector, small length of pipe through the bucket lid, then the curve fitting.

With a little glue on the lips of the fittings and pressing them tight, you get a very solid seal to the bucket lid and lock the parts in place by the flanges of the fittings.

11/19/2017 8:33:32 AM Steve
just wondering what size vac you have? I have a 3.5hp. I suspect the stronger the vac, the collapse of the container is more likely.

11/19/2017 8:35:27 AM Steve
also wondering if there is a way to put a site glass in the wall of the sump container to monitor the level? would make it easier.

11/19/2017 11:34:14 AM TinkerT
I believe the one I have is a 6hp.... Was the strongest small unit I could find.  And yes... I do think it would be a factor about bucket collapse.

I have considered the view-port.  Mine fills so slowly that I decided it wasn't worth it though.... however, drilling a hole or two and sealing a plexi to it was what I was thinking.  Of course, the plexi would go on the outside since the suction would be to the inside.

11/23/2017 9:12:11 AM steve
Ok, you said you used hot glue to fasten bucket to top. I am wondering if it sticks well. I have tried 3 different caulks including silicone and none of them stick to the bucket?? any ideas. Maybe the hot glue is best?

11/27/2017 11:15:14 AM TinkerT
The fit of my bucket is really tight, so the glue is just to seal any air leaks.  The glue does seem to stick to the plastic, but I bet it could be ripped off if you tried.

If you have some shifting of the bucket to the wood, I would use three pretty flat pan-head screws and attach it from the inside to prevent shifting.  Then it really would not matter what kind of glue or caulking... it would just be there to seal things up instead of holding the bucket, etc. 

7/18/2018 1:14:24 PM Roy
Hi I don't know if you are still monitoring this site or not but thought I would ask and see.
I have built a unit like yours but have not put it on a bigger catch bucket as of yet.
Two questions, I see that other designs of this the vac pipe is cut right at the top where as yours is longer. Will this make a difference?
Also do I need to fit this to a bigger catch bucket in order for this to work properly?

Thank you

Roy

7/18/2018 2:06:19 PM TinkerT
Yes, Seems to, and Yes.  :)

Yes I am still monitoring and happy to respond to questions.

I noticed better performance with a medium or long pipe that goes out to the vacuum.  I think it helps ensure the debris doesn't go straight from the slightly turbulent incoming air, directly into the out-flow.  Gives it a little more time to be sure it gets into the circular motion that forces debris out of the air against the sidewalls.  It didn't seem to make a difference between a medium and long, but did make a difference over a short/no pipe for me.

You could use a 5 gallon bucket for your lower (as long as your shop vac doesn't cause it to collapse), but it needs some kind of lower bucket to drop the debris down the sidewalls and into past the slits.  Without the lower bucket the air movement seems to keep disturbing the debris in the bucket too much and returning it to the airflow.  Having only slits to prevent too much air movement in the lower container seems to be a big key for why this worked out so well.  Also, tape, caulk, weather stripping, or hot glue should be used to seal the connection between, etc... every bit of air that gets around seals/connections will reduce the suction you maintain.

9/12/2018 3:57:58 PM Darkdelta
I will build this also. Thanks for being creative, I was at the end of the line when creativity was being handed out! I wonder how this would work with the entire bottom removed? I suppose the bottom provides some structural stability. Regardless thanks for sharing!

9/14/2018 7:35:53 AM TinkerT
You are very welcome.

The bottom having slots that drop debris into the bigger container not only provides structure to keep the bucket from collapse, but also keeps too much air from getting into the lower container and stirring debris back into the air flow.

2/4/2019 8:05:12 PM Jim
Would this system work  on a larger dust collecter ? A 2hp harber frieght.

2/5/2019 10:07:50 AM TinkerT
Jim, I do think it would, but dust collectors often run on a lower speed with higher volume, so I can't say for sure how well.

2/10/2020 11:49:55 AM Majkl
Good day . I would like to ask whether it works for fine sawdust or drywall 100%. If nothing gets to the vacuum cleaner filter? I built something similar but cyclone-based and the fine dust passes to the vacuum cleaner filter. I would give a photo but I do not know where. Have a nice day Majkl.

10/4/2020 7:48:43 PM Robert
Hello,

Regarding the main Lid on top of the bottom container, is the Weather Strip is enough in making a thigh seal without any succion loss ?  Would it be better to install kinda sort of mechanical hooks to make sure it stays put and not loosing any sir succion ?

My 2 cents !

Many thanks

10/6/2020 12:42:15 PM TinkerT
In this case, it doesn't need any additional clamps unless you might knock it over.  As the suction increases, it actually tightens the lid against the weather strip, so it compresses more and creates a great seal.

This is very soft and thick weatherseal though, so I think that makes a difference.  A harder rubber or thin weatherseal might need additional clamping though.

10/6/2020 12:48:55 PM Robert
I'm working hard to get this Cyclone Dust collector completed B4 Christmas !! I'm joking...!
Many thanks for your fast reply, appreciated !
Regards,

Add Your Comment...

Please Keep All Comments Family-Friendly

Name / Nickname:  
Comment:  
Email:   (Optional)
      Notify me of new Comments/Replies to this post by email
      Remember my Email for future comments
Your Email is Never Shared. Email is only required if you want to be notified
of new comments or if you are entering a give-away.


Please Type This Verification Code:   1xlxir    (Code is case sensitive.)


TinkerT Terms & Disclaimer


     Step one to DIY is safety. Use applicable safety equipment, read instructions, and handle all tools with care. While this site encourages a Do-It-Yourself attitude and has ideas and how-to posts, it is not responsible for any problems that arrise from attempting similar DIY projects.
     Familyweb.us and TinkerT makes no representations or warranties of any kind (expressed or implied) about the completeness, accuracy, reliability, suitability, or gramatical correctness of any information or recomendations contained on this site or found by following any link on this site. All the information provided on TinkerT is for general information and entertainment purposes only. Following any advice or information on this site is done "At Your Own Risk". Under no circumstances will Familyweb.us or TinkerT be liable for any loss or damage (including without limitation direct, indirect, or consequential loss or damage) arising from use or misuse of information provided in this website.
     Copyright Policy - Unless otherwise noted, Familyweb.us is the legal copyright holder of all material on this website. Submitions and comments will be considered the property of Familyweb.us and may be used, whole or in part, for purposes on the site or other related projects. Please feel free to copy and reprint any portion of the articles and posts on this site. However, you must include a clear label for where you got the material and include a link to the appropriate page for the post that material was copied from.
     The opinions expressed by any Third Parties (including commenters) are their own and do not represent the position or believe of Familyweb.us or TinkerT. TinkerT reserves the right to remove or edit comments for any reason deemed nessesary, including, but not limited to: spam, offensive language, inapropriatness, and general rudeness.
     TinkerT will never sell or share your email with any third party and will not send you advertizements or spam.
     Familyweb.us and TinkerT reserve the right to change the focus of, close, or sell this blog site without warning.

     While TinkerT and Familyweb.us strive to ensure all posts and comments are PG13 or less, it makes no guarantees of this and requests that anyone under 17 ask their parent's permission before signing up for the newsletter or reading this site.

     These terms and conditions are subject to change at anytime without notice.


aquariums
archives
cooking
crafts
denver
DIY
electronics
home improvement
ideas
landscaping
low budget
mountain living
nature
outdoor
painting
plants
style
the tilt
tools
travel
woodworking

instant pot
  smart scripts