


| Next Post - Previous Post List View
| |
 | 6/2/2014 11:23:55 AM Toilet Repair |
There are certain things I like to build and fix, and then things that just drive me batty. Usually things that I have to repair because someone didn't do it right when they installed or built the things in the first place. And almost always falling under that category is Plumbing. So hubby and I made a deal some time ago that went like this...
So hubby is in charge of anything plumbing related unless it is new or creative plumbing. And yes, you can probably just replace the word creative in any of my posts with "jerry-rigged". In any case, that puts the hubby in charge of toilets that seep water any time they are bumped too hard. And considering the fact that sitting very carefully (isn't that a lovely picture) has been the standard for the last year or more on the master bath toilet, it was well past time for a repair. So... here is a few things to note:
And then you get to work. Our situation was a small water seepage when the toilet would get knocked into, and then it would not seep again for months. From previous experience we knew this meant that the bolts, for some reason or another, were not holding the toilet down tight on the wax ring. Rocking toilets are also normally the same problem along with an un-even floor, but they probably seep a LOT and would need fixed right away. With a cursory inspection of the bolts on the side of the toilet, it was obvious that just tightening them would not work... for one thing, one bolt was completely loose under there, and the other was already tightened way past normal. This indicated a broken or bent flange (the part that holds down the bolts to the floor). So we got all the parts (we thought) that we would need and planned for repair last weekend. Step one... Put on some rubber gloves, turn off water to tank, and remove water from toilet... Flush several times to empty the back tank, then get rid of remaining water in toilet. To empty the toilet it can help to quickly pour about a gallon of water in. The added water causes the toilet to flush and can result in much less water to remove. After that, you can go at it with some kind of scoop, but I just grabbed a handful of rags and stuck in the little remaining water to soak it up, then put them into a nearby bucket since I knew I would have a lot of rags and towels to wash later. Then make a little dam around the toilet area with rags or old towels. No mater if you get all the water out of the toilet, there will probably be a little more that comes out. Also put down some newspaper or other water barrier where you will be moving the toilet to while working on the flange and drain area. Step two... disconnect the water line, remove nuts and washers from the old bolts, and clear away any caulking that may be where the toilet meets the floor. Then wiggle the toilet to help break the seal where the wax ring is and lift it off the floor and over to the prepared place. If the wax ring is still stuck to the floor flange, then no worries, but if it is stuck to the toilet, it can be helpful to have another person there to pull it off before you set the toilet down... also with gloves or paper because that is STICKY wax. Step three... remove any wax (or usually the whole wax ring) from the floor flange and inspect for problems. Sensitive stomachs should LOOK AWAY. 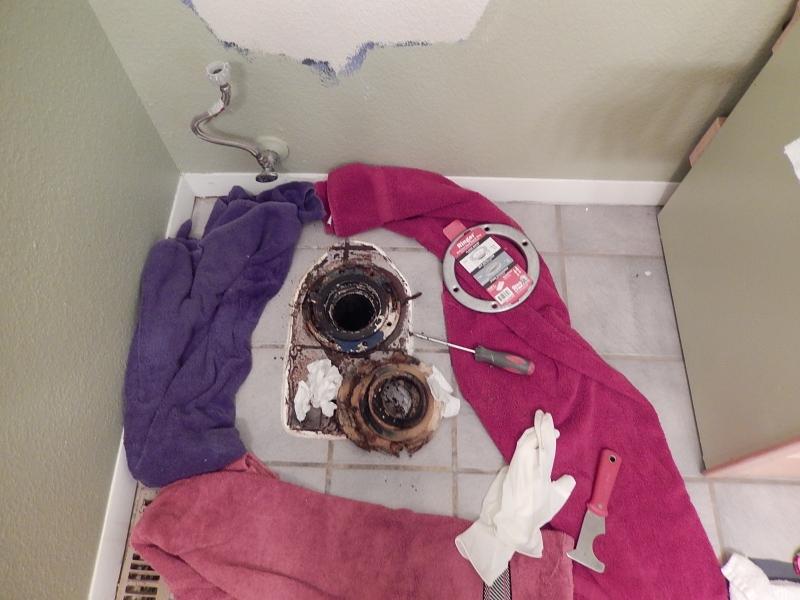 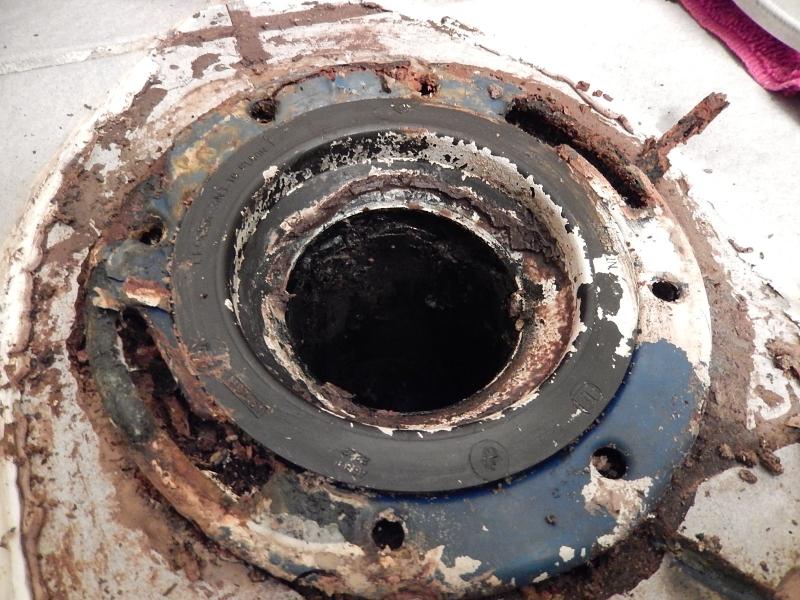 Hubby and a half-gallon of beach is the only way to clean this but first we needed to identify the problem with the flange. The existing floor flange was not only cracked on one side, bent on the other, but the actual flange wasn't attached to the floor at all! What were they THINKING? Just to note... The floor flange should be attached to SOMETHING... err... a floor maybe? 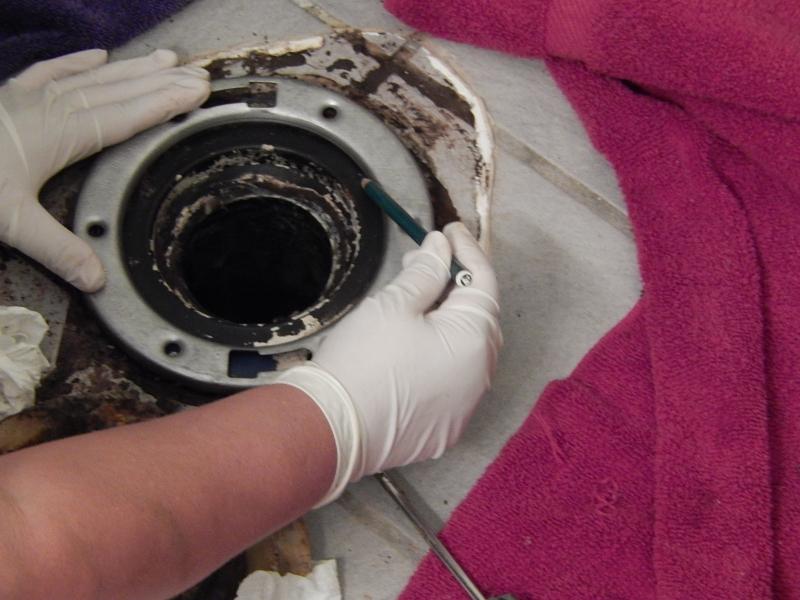  In any case, we had gotten a super-duty flange ring, but the existing flange was held down by the edges of a plastic fitting that was obviously glued to the waste pipe, so after hubby had no luck googling a good way to fix that without cutting the whole thing out, I decided to trim off the edge of the fitting with a cutting disk on my rotary tool. I marked the cut line with a colored pencil and made several passes with the cutting disk. This is NOT usually how toilet flanges are put together in my experience, but if yours is, you may want to figure a way to cut out the upper pipe and replace the whole situation. Not what we did, but I think it might be better in most cases. In any case, we had gotten a super-duty flange ring, but the existing flange was held down by the edges of a plastic fitting that was obviously glued to the waste pipe, so after hubby had no luck googling a good way to fix that without cutting the whole thing out, I decided to trim off the edge of the fitting with a cutting disk on my rotary tool. I marked the cut line with a colored pencil and made several passes with the cutting disk. This is NOT usually how toilet flanges are put together in my experience, but if yours is, you may want to figure a way to cut out the upper pipe and replace the whole situation. Not what we did, but I think it might be better in most cases.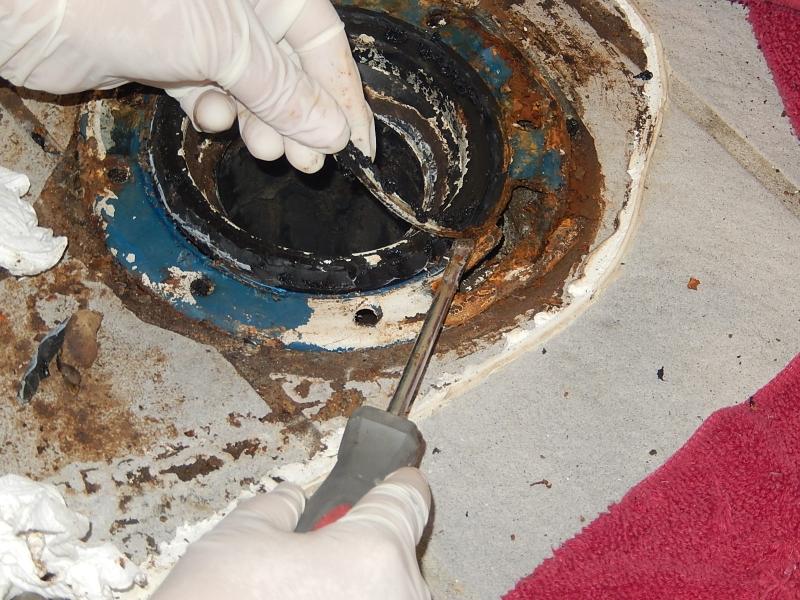 However, we decided that the flat edge of the fitting would still be plenty for the wax ring to connect with despite the outer edge being removed, and the pipe was also plenty rigid in place, so we were not worried it would just get pressed down into the hole and not squish the wax ring tight. However, we decided that the flat edge of the fitting would still be plenty for the wax ring to connect with despite the outer edge being removed, and the pipe was also plenty rigid in place, so we were not worried it would just get pressed down into the hole and not squish the wax ring tight. I was able to pry the old flange away easily since it wasn't actually attached to the floor. And after some chipping of grout and some tile to get the flange to actually fit flat on the floor (also something that wasn't done correctly when the toilet was installed), we were ready to install the new flange with special screws meant to go into concrete. Except... the package of screws we had gotten for this purpose magically disappeared in the last big house cleaning. ( Yes, I do clean the house once in a while... and regret it every time. ) And since we needed to go to town for some groceries Sunday, we decided to cover the pipe with foil and get the screws then. I was able to pry the old flange away easily since it wasn't actually attached to the floor. And after some chipping of grout and some tile to get the flange to actually fit flat on the floor (also something that wasn't done correctly when the toilet was installed), we were ready to install the new flange with special screws meant to go into concrete. Except... the package of screws we had gotten for this purpose magically disappeared in the last big house cleaning. ( Yes, I do clean the house once in a while... and regret it every time. ) And since we needed to go to town for some groceries Sunday, we decided to cover the pipe with foil and get the screws then.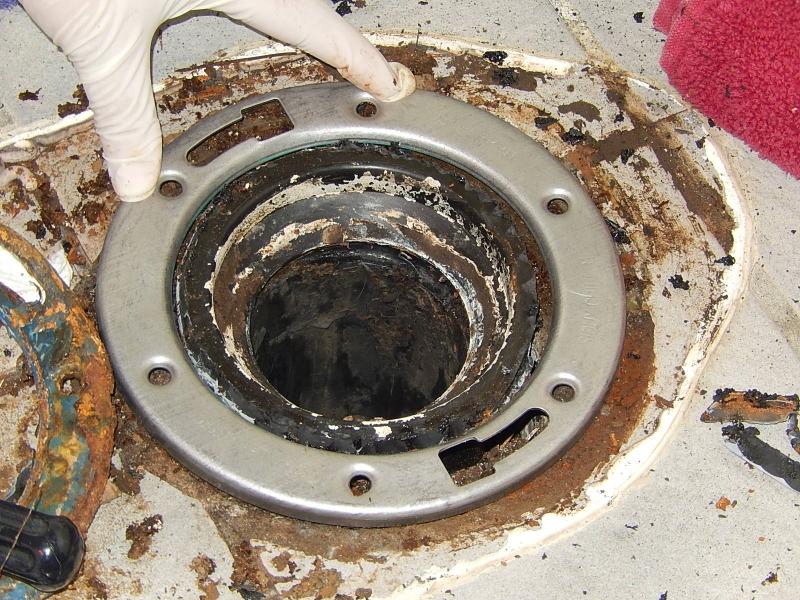  Next day, screws in hand, and the exact size of masonry drill bit... And yes... you CAN drill into concrete using a normal drill. NO you don't have to have a hammer drill or impact driver... 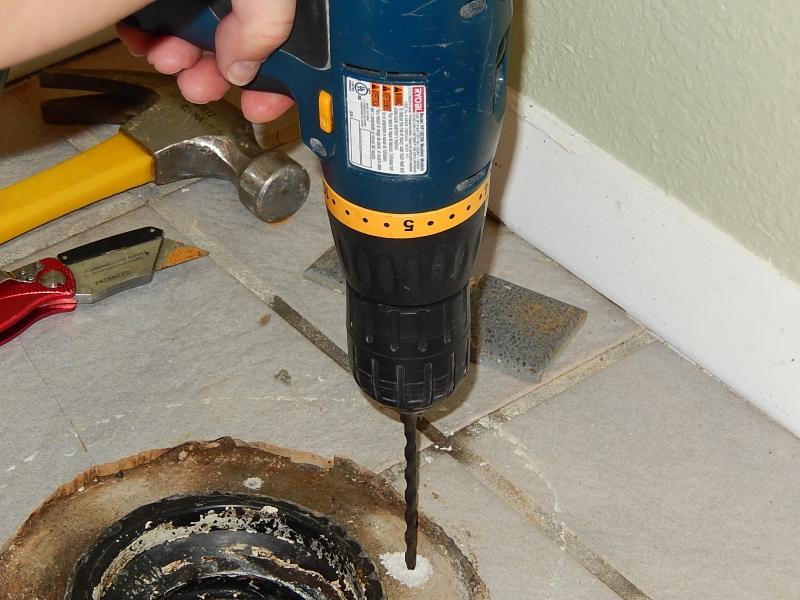 BUT you have to do it slow and stop often to keep the drill from over heating and you will go through a LOT of batteries doing it... and make sure you have a hubby or someone else on hand if your wrist is hurting, because you won't be able to drill more than one of the minimum four holes otherwise. And besides... plumbing is his job, right? BUT you have to do it slow and stop often to keep the drill from over heating and you will go through a LOT of batteries doing it... and make sure you have a hubby or someone else on hand if your wrist is hurting, because you won't be able to drill more than one of the minimum four holes otherwise. And besides... plumbing is his job, right? Something to note here is to make sure that the flange is rotated in the right way to allow the bolts to come up on the right spots for your toilet, or you could have to start all over or have a very crooked toilet. Not something we forgot, but it sure could have been if we didn't think about it hard before marking the screw holes. 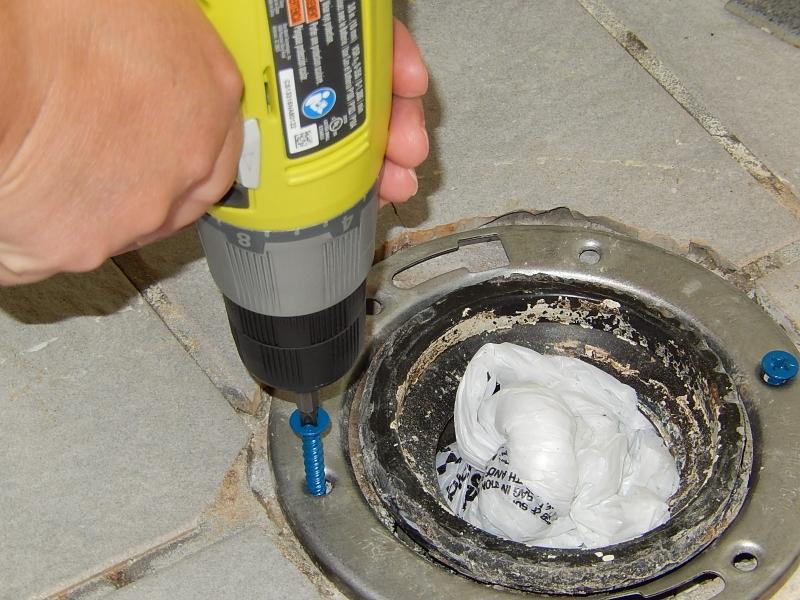 And a few hours later... (maybe I do need an impact driver or hammer drill) the holes were done and ready for tapcons (special concrete screws) to firmly attach the flange to the floor. I left each screw a little loose until they were all in the holes and then tightened them carefully a little at a time until they were all seated firmly. Do NOT over-tighten tapcons... you can strip them out and then you will have to drill an entirely new hole. And a few hours later... (maybe I do need an impact driver or hammer drill) the holes were done and ready for tapcons (special concrete screws) to firmly attach the flange to the floor. I left each screw a little loose until they were all in the holes and then tightened them carefully a little at a time until they were all seated firmly. Do NOT over-tighten tapcons... you can strip them out and then you will have to drill an entirely new hole.Then using the instructions on the box, hubby put in the bolts. But wait! the bolt heads have a wide direction and a narrow direction and they spin and can be left with only a small connection on each side of the flange. So I had a flash of brilliance and marked the direction of the widest part of the bolt head onto the bolt tip with a marker. 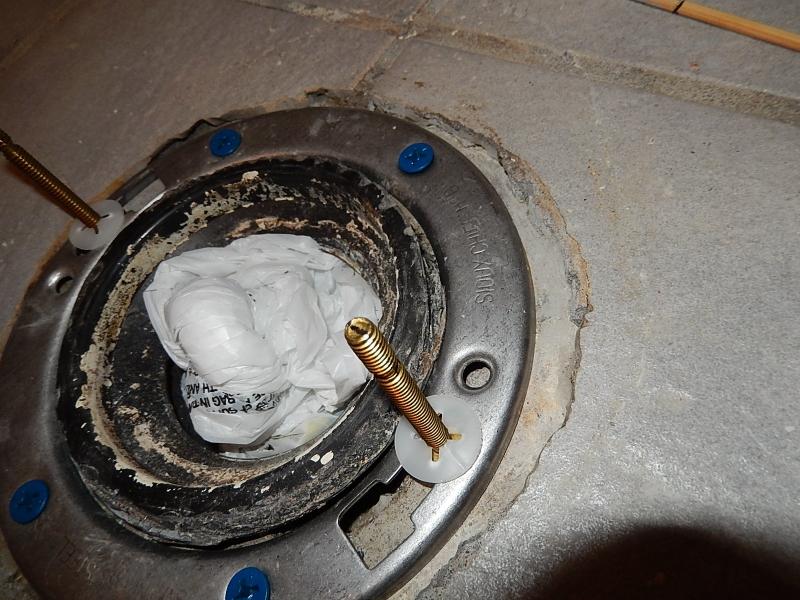 This way when hubby tightened the bolt he was able to grip the upper bolt with pliers and make sure that it was turned the right way for the best attachment as he tightened the nut. This way when hubby tightened the bolt he was able to grip the upper bolt with pliers and make sure that it was turned the right way for the best attachment as he tightened the nut.So with hubby lifting the toilet and me eyeing the bolts and wax ring, we got the toilet set in the right place and ready to go. 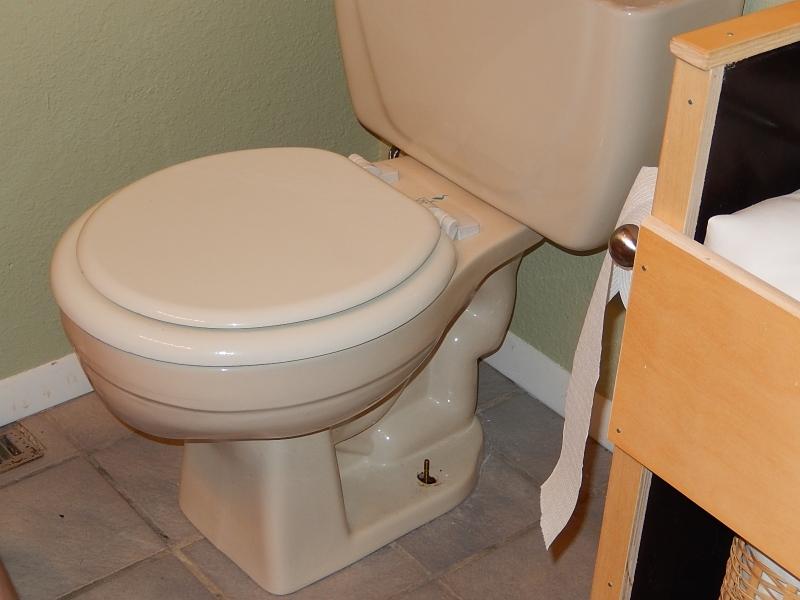 But first... circling back to the reason to buy the toilet shims even if you don't think you will need them... the front right tile was just a little lower than the rest of the tiles and needed a shim to support the toilet evenly. Great! The only part I didn't get at the last trip to the store, because I thought "I'm sure it's fine... it's on tile that's flat." Yeah... no. So to prevent having to go back to the store again, I went for my go-to source of strong plastic. Yep... a cat litter bucket top. Strong non-compressing plastic that is relatively easy to cut into shape and ended up being the exact width needed to support the front corner of the toilet. I cut two just in case, but only ended up needing one... and for my part, I think the wide support over the full area needed may end up being better than just the inch wide shims. 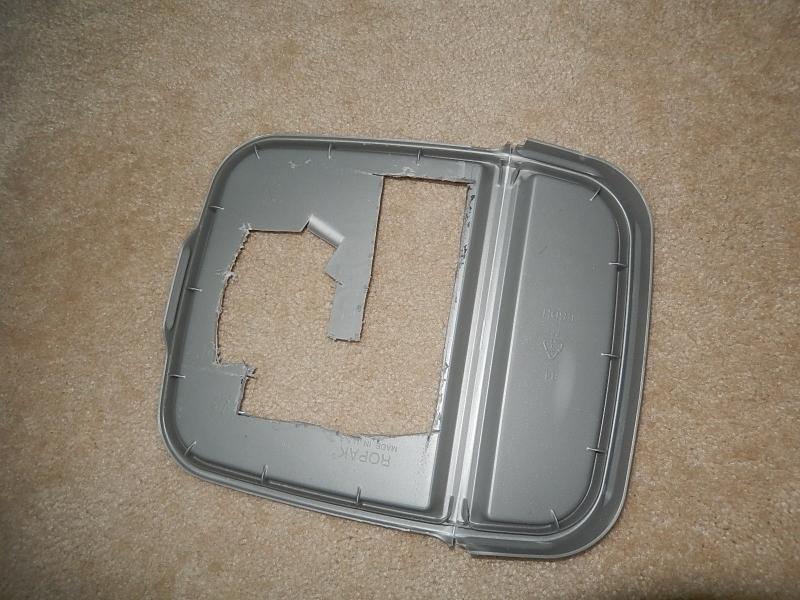  Hubby tightened the bolts (making sure the line I marked was perpendicular to the toilet base). And done... And now all I need is a new toilet seat because... yes... I know a white toilet seat doesn't go on an almond toilet.
| |
Next Post - Previous Post List View | |
| COMMENTS | |
| 6/2/2014 4:44:58 PM Punkin What a huge undertaking but so happy to hear that there was a fix so the whole floor would not be ruined. |
Add Your Comment...